![Sunset over the Golden Gate Bridge and Marin Peninsula, Californial. Click to see 800x600. [C-2020Z]](http://dpfwiw.com/images/marin_sunset.jpg)
![]() Tips and
tricks
for Oly digital camera users—pearls that don't
quite fit elsewhere on dpFWIW
Tips and
tricks
for Oly digital camera users—pearls that don't
quite fit elsewhere on dpFWIW
On this page, in alphabetical order—
- Bagging the Armor
- Caching Images On the Road With A Handheld PC
- Charged or Discharged?
- Digital Zoom—A Nearly Pointless Feature
- LCD vs. Viewfinder
- Macro Envy Relief
- Panorama Menu Lockouts
- SmartMedia Device Capacities
- TIFF Menu Lockout
- Timing—Shutter Lag and Intershot Latency
- Uploading Images For Camera-Based Slide Shows
- Viewfinder Zoom Calibration
- References and Links
Last updated July 27, 2004
Bagging the Armor (Oly digital rangefinders only)
Not having to be all that careful about how you put your camera away is one of the best reasons to armor your Oly digital rangefinder's zoom lens. But with the armor in place, these otherwise compact cameras no longer fit in the smallest point-and-shoot bags. Nor will they squeeze into the form-fitting leather case Oly sells in its rangefinder accessory kit. (Of course, at ~$105 as of 4Q2000, the kit's a bad deal for most users anyway, but that's another story.)
Minimum Requirements
So what does work with an armored Oly rangefinder? Well, any bag with a padded compartment with inside dimensions of at least 4.5 x 4 x 2.75".
Beyond that, anything goes. I wouldn't presume to give advice about something as personal as a camera bag (I gave up on handbags as gifts for my wife long ago for the same reason), but I will share my experiences with some workable options for the armored Oly digital rangefinder:
Tamrac Belt Minibag
For many months, I routinely carried my armored C-2020Z in a small padded Tamrac mini belt bag ($35 at Wolf Camera as of 3Q1999). The minibag eventually became too much of a squeeze for the gear I've taken to carrying, but when I carried a little less, it was big enough. My particular minibag dropped off the Tamrac product line some time ago, but their Model 5696 Digital 6 bag looks like a decent if modest improvement on the same basic design. Fully loaded with all the gear listed below, the bulging minibag measured about 7 x 6 x 6" in outside diameters. That's about as much as I've been able cram into it.
Tamrac Mini Belt Bag at Capacity |
||
| Compartment | Fastener | Contents |
| Main | Buckle |
|
| Lid | Zipper |
|
| Front | Zipper |
|
I still clip this minibag onto my larger hip bag to keep the essentials—camera, several memory cards, 2 battery sets, a lens shade and 1-2 selected filters—handy and safe on outings requiring ready access to the camera.
IMO, this minibag would be close to perfect if only it were a tad bigger and the belt straps had velcro releases at the bottom so I could avoid those looks when I undo my belt in public to get the darn thing on and off. (I wouldn't miss fumbling to catch my cell phone as it starts to slide off the undone belt, either.) Unfortunately, the Digital 6 update to my bag doesn't appear to make any headway on these fronts. Bruno Melli finds his Digital 6 bag ill-suited to foul weather and rough-and-tumble activity. That was true of my Tamrac minibag, but it did well enough in a light rain.
Tamrac Adventure 5 Hip Bag
When my gear finally outgrew my mini belt bag, I moved up to a Tamrac Adventure 5 Hip Pack (model 5705) for routine use. This roomy, contoured hip/shoulder pack has room for all my usual accessories plus several bulkier items that the minibag could never accommodate, including my trusty Oly B-300 teleconverter. There's even room now in the front pouch for the small portable CD player I usually bring along on hikes, previously in a separate case.
The 5705 is very comfortable as a hip pack, but I may like it even more as a shoulder bag. Its contoured shape hugs my side to keep the bag in place—no flopping around over rough ground or on a brisk hike. With its flip-forward top, the open bag provides some very welcome "counter space" to futz with filters, batteries, lenses, etc. on the hoof. When it comes time to expand, the 5705 will accept at least 2 add-on cases via the Tamrac Modular Accessory System, but I can add room well enough by clipping my old Tamrac minibag onto the 5705's shoulder strap with a karabiner.
Tamrac Adventure 5 Hip Pack at Capacity |
||
| Compartment | Fastener | Contents |
| Main | Double zipper; top flips toward the front for easy access |
|
| Lid | Zipper |
|
| Front | Zipper | |
Oly Leather Camera Pouch
A friend with a C-3030Z has a handsome Oly black leather zippered pouch that just fits his armored camera. He can pack an extra set of batteries and a few extra memory cards as well, but that's about it. Unfortunately, I know neither the model number nor the camera for which Oly actually made his case, but it looks a lot like the "soft leather case" Oly sells for its digital SLR/EVF cameras like the C-2100UZ.
Nanobags
When bringing along even a small camera bag won't do—say, at a dressy gathering—I let my armored camera fend for itself and pocket a nanobag containing the bare essentials—4 spare AAs and an extra memory card.
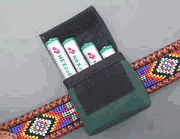
A nanobag can also hold a pair of 49 mm filters wrapped in a small lens cloth. Two nanobags fit easily on my belt or camera strap—or even in the same pant pocket. To minimize flexing of the memory card against the batteries, I add a stiffener cut from an old plastic credit card.
I've also taken to carrying 2 additional spare battery sets in nanobags in the front pocket of my main hip bag. The batteries are then ready to stuff into a pocket or slap on my belt for a quick side trip without the main bag.
Suppliers
BTW, Amazon.com has a surprisingly large selection of Tamrac bags and Oly-brand camera accessories at decent prices as of 2Q2001. Nanobags can be had at greenbatteries.com, where they're sold as a AA battery caddy.
Caching Images On the Road With a Handheld PC
When I can't carry enough SmartMedia (SM) cards to cover a long trip, I free up the cards I have by caching images along the way. There are more elegant ways, to be sure, but I'm happy dumping full SM cards onto one or more large CompactFlash (CF) cards using the file handling services of a Hewlett Packard Jornada 720 Handheld PC (HPC) equipped with a Type I CF slot and a Type II PC card slot. When the need arises, I clear off one of three 256MB Type I CF cards usually loaded with digital music files for portable playback on the HPC. The music's easy enough to reload when I get home.
Both phases below follow a very conservative copy-then-delete strategy.
Freeing Up Used SM Cards On the Road
With the HPC off, load the receiving CF card into the HPC's CF slot.
Load a used SM card into an SM-to-PC card adapter (like Delkin's ATA-compatible DDSMFLS-AD adapter) and seat the adapter in the HPC's PC card slot.
Turn on the HPC. The CF and SM cards will appear as folders labeled "Storage Card" and "Storage Card2". Determine which card is which (it seems to vary) before proceeding.
Make room on the CF card as needed. Then create a separate CF card folder for each SM card to be dumped.
Copy all image files from the SM card to the destination CF card folder using drag-and-drop or copy-and-paste commands as preferred.
Confirm the copy by viewing a test image or two in the destination CF folder via the HPC.
Turn off the HPC and remove the SM card and adapter.
Use the camera, not Windows, to erase all the images on the copied SM card.*
Repeat Steps 2-8 for each SM card to be cleared.
When done, store the receiving CF card in a very safe place.
The entire process takes about 3-4 minutes per full 32MB SM card, including the card swaps.
* Technical Note: If you use Windows to delete image files from a memory card acting as a drive or storage card, Windows may try to create a Recycling Bin on the card, but many cameras reject cards altered in this way. Using the camera to delete images from copied SM cards avoids this potentially serious gotcha.
Off-Loading the CF Card At Home
Since the Windows NT4 operating system on my home desktop PC lacks USB support, I lack a fast memory card reader, but I can still read cached images off a CF card at 11 Mbps by networking with my HPC as follows:
With the HPC off, load the receiving CF card into the HPC's CF slot and insert a network card in the HPC's PC card slot. (I use a D-Link's DCF-650W wireless 802.11b network card for an 11 Mbps connection here, but any reliable network connection will do. Even at 115 Kbps, a serial or IrDA connection would be far too slow for the volume of data involved.)
Turn on the HPC and establish a network connection to a desktop PC using ActiveSync 3.0 or later with HPC-to-desktop file conversion disabled.
On the desktop, create a separate destination folder for each CF folder to be copied.
Using Windows Explorer or ActiveSync's Explore command, copy images from a CF card folder into a destination desktop folder using drag-and-drop or copy-and-paste commands.
Confirm the copy by viewing an image or two in the destination desktop folder.
Repeat Steps 3-5 for each CF card folder to be transferred.
When done, clear the receiving CF card.
This final image collection takes about 2-3 minutes per CF folder at 32MB per folder. Granted, it'd be a lot less cumbersome to drag-and-drop all the CF card folders to the desktop at once, but whenever I try that, Windows (either WinNT4 or WinCE for the HPC 2000, I can't tell which) posts an "insufficent disk space to convert file" error and skips the file transfer.
Charged or Discharged?
Carrying multiple battery sets is your best insurance against power shortfalls. But how do you keep track of which of the sets you have along are charged and which are discharged?
Here's a simple and reliable mnemonic based on how the batteries were arranged in the device they last visited. This scheme works best when your charger, camera and battery caddies all take sets of 4 AAs. Since that's almost always the case, we'll proceed on that assumption.
Most AA chargers require all 4 positive battery terminals to point in the same direction. But AA-compatible Oly cameras take their AAs in an alternating pattern—2 positive end up and the rest positive end down.
When removing AAs from either charger or camera, load them into your battery caddy the same way they sat in the device they just left. A glance at the battery arrangement in the caddy will then tell you whether they're fresh from the charger or spent from the camera.
If you can't remember which arrangement is which, your camera's battery compartment is always there to remind you.
Digital Zoom—A Nearly Worthless Feature
Digital zoom (DZ) is next to worthless in digital still cameras. The marketing folks made the designers throw in this video holdover because it sounds sexy, but you'll be hard-pressed to find a good use for it beyond the seldom-needed role mentioned below.
-
In most cameras, DZ amounts to nothing more than in-camera cropping—something usually much better done in post-processing. Such cameras build their DZ images using only data from some centered subset of pixels (e.g., the central 1/4 for "2x" DZ) while ignoring surrounding pixels. Since the resulting images contain fewer pixels, DZ might conceivably help you conserve memory when you're running low and know you're going to be cropping anyway, but that's as useful as it gets.
- More sophisticated DZ implementations (Sony's "precision" DZ, for example) apparently interpolate the data from the central pixel block up to full operating resolution, but that, too, may be better done in post-processing.
Either way, forget about DZ as a routine way to enlarge your images. It's also meaningless as a comparative point for cameras under consideration for purchase.
A Redeeming Role for DZ?
OK, it's not completely pointless. DZ can help you dial in the best possible manual focus via the LCD, particularly when the camera is used with telescopes, microscopes and other devices requiring an afocal coupling. In such instances, the best focus may fall just short of the full-bore "infinity" manual setting.
LCD vs. Viewfinder (for Oly rangefinders)
Is it better to take handheld shots through the viewfinder or the LCD? I say both. You won't find a strong consensus on this issue among digital photographers at large, but I shoot through my Oly rangefinder's optical viewfinder whenever I can. I also keep my LCD on most of the time and check it frequently. The LCD's feedback is well worth the extra battery changes in my book, and the battery swaps are far from onerous, even with heavy LCD use.
Even when I check the LCD, I go out of my way to take handheld and monopod shots through the viewfinder to steady the camera against my brow. I also find the viewfinder image easier to work with most of the time, especially in bright environments—even with an LCD shade in place.
LCD Advantages
Shooting through the LCD does have its charms, provided you manage to avoid the camera shake it promotes.
Shooting with the camera away from your brow tends to make for more candid shots of people, who often stiffen up when they spot a camera coming into shooting position. When the deer-in-headlights look just won't do, try capturing your subjects before they realize what you're up to.
Shooting through the LCD also liberates you from an eye-level view of the world. Professional photographers go to great lengths to get unusual angles on things because they know it pays. A willingness to shoot through the LCD makes that a lot easier.
LCD Feedback
The LCD image is usually a lot closer to WYSIWYG than the viewfinder's. Viewfinders typically show less of the actual image captured than the LCD, are prone to parallax at short camera-subject distances (particularly with macro work), are easily blocked by bulky lens accessories, and may not be perfectly aligned with the camera's CCD.
Whether or not I shoot through it, I always consult the LCD on
-
Critical shots—to confirm and fine-tune framing.
-
Macro shots—to compensate for serious framing offsets due to parallax.
-
GND filter shots—to position the density transition just so.
-
Shots subject to blooming—to evaluate countermeasures.
-
Manual focus or hyperfocal shots—to confirm and fine-tune my focus, often in conjuction with digital zoom (which I use for no other purpose).
-
UV (18A filter) shots—only the LCD shows what I'm really getting, and I'm continually surprised at what I see.
-
Shots with strong horizontal or vertical cues—to compensate accurately for my C-2020Z's ~1° viewfinder tilt.
-
Tripod shots—no reason not to
And I sometimes check the LCD for
-
IR (R72 and 87 filter) shots—only the LCD shows what I'm really getting, but I'm getting better at previsualizing these.
-
B&W shots—to previsualize potential scenes in B&W mode (but I always record B&Ws in color)
-
Teleconverter or lens shade shots—to confirm and fine-tune framing via the LCD when these bulky accessories block enough of the viewfinder
BTW, I rarely turn to the LCD to adjust my polarizer, which I use quite a bit outdoors. Instead, I rely on a quick and reliable "blind" polarizer adjustment method.
Macro Envy Relief (documented only for the C-2000Z, C-2020Z, C-3000Z, C-3020Z and C-3030Z)
The bad news: By Nikon CoolPix standards, the macro performance claimed for Oly digital rangefinders is so-so. The C-20x0Z, for instance, can officially focus a minimum field of view (FOV) of 3 x 2.4 inches (7.6 x 6 cm) at a minimum lens-subject distance of 8 inches (20 cm) in macro mode. Oly claims similar macro performance for all its digital rangefinders.
![]() The good news:
The C-2000Z, C-2020Z, C-3000Z, C-3020Z and C-3030Z can all get a good bit closer and smaller than advertised
with this simple undocumented macro mode trick:
The good news:
The C-2000Z, C-2020Z, C-3000Z, C-3020Z and C-3030Z can all get a good bit closer and smaller than advertised
with this simple undocumented macro mode trick:
-
Frame your subject in the LCD at a lens-subject distance of ~ 2.4 inches (6 cm).
-
Zoom in all the way to 3x.
-
Widen out the zoom 4 times, each time by just a tiny amount.*
- Move the camera in and out to fine-tune the focus via the LCD.
* Note: Fewer tweaks of the zoom lever may work, but for a reliable focus, take 4.
| On the C-20x0Z, your smallest in-focus FOV will be 2 inches (5 cm) across, as seen at right. Your zoom setting will be around 2.2x. Depth of field will be very shallow at this range. | ![Steel ruler 6 cm from lens front, handheld. Click to see 800x600 version. [C-2020Z]](http://dpfwiw.com/c-2000z/tips/ruler.jpg) |
![]() Minimum FOV will be slightly larger on the wider-angle
C-3000Z and C-3030Z,
and minimum lens-subject distance may differ as well.
Minimum FOV will be slightly larger on the wider-angle
C-3000Z and C-3030Z,
and minimum lens-subject distance may differ as well.
| Watch out for viewfinder parallax and barrel distortion at this range. |
This trick gets you a good bit closer to the gold-standard minimum FOV of 0.8 inches (2.0 cm) reported for the Nikon CoolPix 990. How well it works on C-x040Z models, I have no idea.
Acknowledgments: Michael Walter of RPD found this macro-enhancing gem in Reiner Emmling's German-only site www.emling.de. Thanks to Leandro Otero for the e-mail confirming this trick on the C-3020Z.
Panorama Menu Lockouts (Oly rangefinders)
Can't select the panorama mode icon in your Oly rangefinder menu? (It's the rectangle with one corner shaved—presumably a SmartMedia card silhouette.)
![]() Before you
can access panorama mode on any Oly rangefinder, you must first
Before you
can access panorama mode on any Oly rangefinder, you must first
-
Load an Oly-brand SmartMedia card (sorry, no way around this)
-
Turn the mode dial to "P", not "A/S/M"
- Turn on the LCD before entering the menus.
Note: My C-2020Z manual says panorama mode will work with the mode dial on "A/S/M", but it won't.
On the C-30x0Z, including the C-3040Z, you'll also have to set the REC VIEW feature to something other than CHECK, which also locks you out of TIFF recording. (Granted, it doesn't make much sense to use CHECK with either panorama mode or TIFF recording, but to block these menu options without giving the user a clue as to why is poor interface programming IMO.)
Once you can select the panorama icon, jog right to select "PLAY" and press the [OK] button to bring up the panorama guides in the LCD. Before taking the first shot in the panorama, use the jog buttons to specify which way you'll be panning. Left to right is the default.
To what extent these panorama restrictions apply to the C-2100UZ, I don't know.
SmartMedia Device Capacities
The SmartMedia technical specification finalized in mid-1999 allows for memory card capacities up to 128MB and perhaps beyond, but SmartMedia devices designed earlier in the game may max out at 32MB in hardware.
![]() The good
news here is that any SmartMedia device already supporting 64MB cards will
almost certainly work with 128MB cards.
The good
news here is that any SmartMedia device already supporting 64MB cards will
almost certainly work with 128MB cards.
Testing by www.digitalkamera.de confirms 128MB SmartMedia compatibility for many common digital cameras, including the Oly C-20x0Z, C-2100UZ and C-30x0Z. I can confirm that personally with my C-2020Z.
As of 4Q2001, rumor has it that 256MB SmartMedia cards are in the works, but how compatible they'll be with cameras capable of taking 64MB cards remains to be seen.
Oly C-2000Z
BTW, most C-2000Zs conform to the final SmartMedia spec, including the early-model C-2000Z (firmware v951-80) I purchased in July, 1999.
Chances are good that your C-2000Z will also take cards beyond 32MB—even though the manual and Oly tech support claim support only for cards up to 32MB.
Testing by www.digitalkamera.de explicitly confirms 128MB SmartMedia compatibility for the C-2000Z.
FlashPath Floppy Adapters
The current-model FlashPath floppy adapter for SmartMedia—the one with metal edges—supports 2-128MB cards in compliance with the final SmartMedia specification. My metal-edged FlashPath is no exception. However,
| Early-model FlashPath adapters with black plastic edges support only 32MB and smaller cards, and no driver can fix that. |
Regardless of labeling, all FlashPath adapters are made by SmartDisk. Their website is the best place to download the latest drivers.
TIFF Menu Lockout (C-30x0Z)
Can't select the TIFF option in the C-30x0Z menu? You first have to change the REC VIEW option to something other than CHECK, which also locks you out of panorama mode (more details there).
This isn't a problem on the C-2000Z and C-2020Z, which lack a REC VIEW CHECK option. If the C-2040Z, C-4040Z and C-2100UZ have this option, test it against both TIFF recording and panorama mode.
Timing—Shutter Lag and Shot-to-Shot Latency
Timing is everything, especially in stop-action work. But good photographic timing can be hard to come by when a long or unpredictable shutter lag (the interval between pressing the shutter release and the onset of the actual exposure) trips you up. Many modern auto-everything cameras have noticeable shutter lags—digital and film alike.
Long shot-to-shot latencies (the time the camera requires to ready itself for the next shot) are another bane to good timing on the digital side.
Luckily, there are effective countermeasures on both fronts, but some come at a price. Follow the links provided to learn about the trade-offs before you use them.
Whatever you do,
| Don't time your shots off the beep! |
Exposure begins and ends sometime before the beep on my C-2020Z. Early on, I timed batters' swings to coincide with the beep through an entire San Francisco Giants game and ended up capturing nothing but pitches! (Someone had given me tickets for seats right behind home plate. Too bad I never bothered to check my work via the LCD at the scene.)
I now use the beep as a "you can move now" signal. Whatever the beep signifies, it always sounds right before the memory card write begins.
Shutter Lag
Your camera has a lot to do to ready itself for an exposure, even after you've given it the go-ahead with the shutter release. When enabled, auto-focus (AF) is by far the most time-consuming pre-exposure task. Auto-exposure (AE), active in program (auto) and priority metering modes, also contributes.
The resulting shutter lag is by no means unique to digital cameras: Film cameras with AF and AE features suffer similar delays. To new digital photographers used to old manual film cameras, shutter lag often comes as an exasperating surprise, but there are simple and effective ways around it.
Minimizing Shutter Lag
To reduce shutter lag, try the following, singly or in combination:
-
Half-press the shutter release in advance to get AF and AE chores out the way beforehand whenever feasible. (Just make sure you're aiming at something that will yield correct AE and AF results when you do.) When the green light in the viewfinder to stops flashing, you'll be ready to shoot with little if any lag.
-
Use manual focus to eliminate AF chores altogether.
-
Use manual exposure to eliminate AE chores altogether.
-
Use manual white balance or a white balance preset to eliminate auto-WB processing as well.
-
Turn off the rear LCD if you have a rangefinder with an optical viewfinder.
These measures are listed in order of decreasing impact on shutter lag. How much the last 3 items really help, I'm not sure, but the half-press is a no-brainer.
Get Into the Half-Press Habit
With a half-press of the shutter release and a steady green "ready light" in the viewfinder, my C-2020Z seems to begin its exposures the moment the shutter release button bottoms out. This makes for very predictable capture timing. As an added bonus, it also helps to reduce camera shake in handheld shots, because
-
you know exactly when the exposure's coming
- you only have to hold still for the exposure itself
Pressing the shutter release all the way at once without the preceding half-press subjects your timing to all the vagaries of AF, which can hunt for a focus for quite a while under certain circumstances. (See your manual for details.) The viewfinder's green ready light removes some of the uncertainty here, but nothing beats the half-press approach for responsiveness and predictability.
Turn Off the Rear LCD, Too?
If the camera's rear LCD or electronic viewfinder (EVF) is on at the time of the half-press, the camera will still have to close the shutter and clear the CCD before starting the exposure. If your camera uses an optical viewfinder in lieu of an EVF, turning the rear LCD off may reduce shutter lag a bit, but I haven't noticed a difference with my C-2020Z rangefinder. If you're lucky enough to have a digital SLR with an EVF, your luck ends here.
Shot-to-Shot Latency
Memory card write time is by far the largest single contributor to shot-to-shot latency, but other post-exposure processing tasks also add up, at least in theory.
To reduce intershot latency, try these tricks, singly or in combination:
-
Record with lower resolution, more compression or both to reduce memory card write time.
-
Use sequence mode, particularly the non-AF variety. My C-2020Z can take 0.7-1.4 images per second this way, depending on the recording mode. Newer models with larger RAM image buffers can sustain even faster burst rates.
-
Disable in-camera sharpening by recording in "soft" mode.
Once again, these measures are listed in order of decreasing impact. How much the last item really contributes, I'm not sure. Note that all these tricks require a menu visit; consult your manual for details.
Uploading Images For Camera-Based Slide Shows
Background
An Oly digital camera hooked to a TV set can be used to present slide shows at meetings, parties or family gatherings. All the display features applicable to the LCD are at your disposal, including manual control with the IR remote and use of the display menu's slide-show function, which cycles through all the in-camera images automatically.
I won't go into the many ways to transfer slide-show images onto a memory card here. Getting the camera to recognize and display them properly is the thrust of this article.
Image files created by the camera and never renamed or altered in any way are easy to upload and redisplay. But my C-2020Z completely ignores image files that have been renamed in violation of certain strict rules and displays a "! Picture Error" message on the LCD when presented with a properly named image that has been edited with non-Oly software—even if I've preserved the EXIF header information. Graphics created outside the camera are likely to fail on both counts.
Keys to Success
Running successful slide shows on an Oly digital camera requires careful attention to
as detailed below. There are lots of ways to screw up here, but the C-2020Z's willingness to display untouched image files from other cameras like the Oly D-340L ("PICnnnnn" filename format) and D-460Z and even the Fuji MX-1200 ("DSCFnnnn" filename format) reveals some useful flexibility.
Since a few of my test upload files failed to display for no apparent reason,
| Always double-check your slide show on the camera before leaving your computer. |
File Names
My C-2020Z displays images in ascending alphanumeric order based on filename but completely ignores uploaded images with filenames it deems invalid.
Be sure to assign slide-show images camera-compatible filenames designed to bring up the images in proper order.
Your camera's native filename format should be a pretty safe bet for uploads. (Consult your manual for details.) The C-2020Z assigns filenames using a "Pmddnnnn.jpg" format, where
-
"P" is required
-
"m" is the hexadecimal month (1-C)
-
"dd" is the day of the month (01-31), and
- "nnnn" is a 4-digit number (0001 to 9999, but not 0000)
Thus my C-2020Z recognizes "P9130001.jpg", but it utterly ignores images with similar but non-compliant names like "P9400001.jpg" (bad day) and "PQ010001.jpg" (bad month). Image "P9130002.jpg" displays before "P9130003.jpg" and after "P8130003.jpg".
Actually, the C-2020Z offers even more naming latitude for uploads. Testing inspired by an RPD tip from Eric Magnuson revealed that it would display most 8-character filenames following an "aaaannnn" format, where
-
"aaaa" consists of exactly 4 letters or exactly 4 numbers (but not mixed), and
- "nnnn" is a 4-digit number (0001-9999, but not 0000).
Thus, my C-2020Z would happily display JPEG images with filenames like
-
buff0001 (but not buff0000)
-
chrt0001 (but not chert001, chrt001 or chrt00001)
-
slim9999, test3175, dogs9999, cats2586
- 11110001, 58742568, and 99999999
while ignoring those with more useful names like
-
aquaticpark, chert, bluebird
- 20001113-1515-03 (my PIE date-time naming scheme)
The C-2020Z also accepts filenames following the D-340L's "PICnnnnn" format. I didn't try any special characters like hyphens or underscores.
File Format—Camedia Master to the Rescue
To record exposure settings and other data along with the images, Oly Camedia cameras record JPEG and TIFF images in the widely-adopted EXIF file format. But manipulating and saving camera-generated images in a non-Oly editor like PhotoShop or ThumbsPlus is sure to draw a "! Picture Error" messages from the camera—even when the edited images are saved with EXIF header information preserved. Something critical in the EXIF header clearly gets mangled in the process, but exactly what that might be, I have no idea.
![]() To avoid "! Picture Error" messages with edited and non-camera slide-show
images, open them one by one in the Oly Camedia Master software bundled with the
camera and save each one in EXIF format using the File menu's Save As command.
The C-20x0Z and C-30x0Z will both be able to recognize and display
the resulting EXIF files, regardless of their origin—provided they're properly
named, of course.
To avoid "! Picture Error" messages with edited and non-camera slide-show
images, open them one by one in the Oly Camedia Master software bundled with the
camera and save each one in EXIF format using the File menu's Save As command.
The C-20x0Z and C-30x0Z will both be able to recognize and display
the resulting EXIF files, regardless of their origin—provided they're properly
named, of course.
I've confirmed this method on the C-20x0Z with JPEGs—including some created with a simple paint program—but not with TIFFs. Sources on RPD confirm that it works with the C-30x0Z as well, and Jere Knuuttila wrote to confirm that it also works on the Oly D-490Z.
Image Format
![]() Here's the bad
news: The C-2020Z firmware will stretch or shrink uploaded images to fit the 4:3 (horizontal:vertical)
format of the rear LCD. The more your uploaded images deviate from 4:3 in aspect ratio, the
more distorted they'll become. This includes 4:3 images rotated 90° into a 3:4
vertical format. Vertical images may also be displayed at unexpectedly small
sizes. Only 24-bit images can be shown.
Here's the bad
news: The C-2020Z firmware will stretch or shrink uploaded images to fit the 4:3 (horizontal:vertical)
format of the rear LCD. The more your uploaded images deviate from 4:3 in aspect ratio, the
more distorted they'll become. This includes 4:3 images rotated 90° into a 3:4
vertical format. Vertical images may also be displayed at unexpectedly small
sizes. Only 24-bit images can be shown.
How later models handle these admitted display challenges, I have no idea.
Viewfinder Zoom Calibration (Oly rangefinders only)
It's handy to know the zoom setting or focal length you're about to use for a shot now and then, but you'll be hard-pressed to find a consumer-grade digital camera able to display it for you. (Cameras with the Digita operating system are the exception—if you write and install an enabling Digita script.)
Here's a rough way to calibrate your viewfinder for focal length. It's pretty ugly, but it's better than nothing.
-
Assuming right-handed shooting, take a series of pictures of your own left hand at full arm's length. The camera-hand distance must be reproducible, so straighten out that elbow all the way.
-
Vary your zoom to achieve easily reproducible relationships between your hand or fingers and suitable viewfinder markings. Shoot as many of these as you need. For example, I used the gap between the left edge of my C-2020Z's viewfinder and either the vertical crosshairs or the left end of left horizontal crosshair to calibrate these zoom steps:
Crosshair Used Configuration left horiz full width of hand with thumb left horiz 4 fingers vertical full width of hand with thumb left horiz 3 fingers left horiz 2 fingers
- Use PIE or any other application displaying EXIF header information to get the zoom settings and focal lengths corresponding to the hand-viewfinder relationships recorded above. Then make a crib sheet for your camera bag, like so:
Zoom Calibration Table
Focal length (mm) Zoom Crosshair Configuration 35 1.0x n/a full wide angle 42 1.2x left horiz full width of hand with thumb 60 1.7x left horiz 4 fingers 67 1.9x vertical full width of hand with thumb 77 2.2x left horiz 3 fingers 88 2.5x left horiz 2 fingers 105 3.0x n/a full zoom
In the field, pull out the crib sheet and interpolate to get the zoom you want. Be sure to bring along a left hand. ;^}
References and Links
(See also the home page links.)
![]() Under construction...
Under construction...
Short Courses Digital Camera Pocket Guides—Dennis Curtin's free printable online mini-manuals for many digital cameras, including all the popular Oly digitals.
Unless explicitly attributed to another contributor, all content on this site © Jeremy McCreary
Comments and corrections to Jeremy McCreary at dpFWIW@cliffshade.com, but please see here first.