|
|
|
On this page— See also the Hyperfocal ChecklistLast updated October 22, 2009 Who's in Charge Here?This article's all about seizing control of exposure. If you don't, the camera will, and the result won't always be what you had in mind. It may or may not be worth taking control of exposure at the company picnic, but when the stakes or aims are high, you can improve your odds substantially by stepping in. Inner VisionYour camera's built-in metering system will seldom have trouble coming up with technically "correct" exposures. In some situations, that's all you'll need, but don't expect the meter to offer exposure settings optimized for your photographic goals in a particular scene. Those goals are almost always driven by things the camera knows absolutely nothing about—things I'll lump together under the term inner vision:
Capturing that inner vision is the ultimate goal of any serious photograph, but the gulf separating what the human brain-eye system sees and feels in the scene and what even the most sophisticated camera senses in the frame is wide and deep. By taking control of exposure and composition, you actively manage that gap to align your vision and the camera's capabilities as best you can. Reducing the gap may make a huge difference, even if you can't fully close it. Here we'll tackle exposure and related issues with a digital slant. For the composition piece, which is no different on the digital than on the film side, I heartily recommend Brian Peterson's book Learning to See Creatively—How to Compose Great Photographs and practice, practice, practice. Issues to FaceYour camera knows nothing of the motion and depth of field challenges you face. Left to its own devices, it will render whatever it's metered in a medium tone, regardless of the tonality you actually see or want. And it may well put what it knows of the performance of its own lens ahead of considerations far more import to you. To cut the best deal across all these critical fronts—tonality, depth of field, motion management and resolving power—you're going to have to step in. If your camera's built-in TTL metering system offers exposure locking and reasonably tight spot metering, as do most current higher-end digital cameras, its exposure suggestions can serve as a solid starting point for all your exposure judgements. Your inner vision and the rules of photography will guide you from there.
Stops, Shutter Speed and ApertureFor anyone who needs it, the next few sections offer a leg up on the definitions and science behind basic photographic terms like stop, shutter speed, aperture, f-number, reciprocity, exposure value (EV) and exposure compensation (EC). Without a solid understanding of these basic building blocks, the rest of the article won't make much sense. StopsIn photographic parlance, a stop or full stop is simply a factor of 2 change in the amount of light fed to the image receiver in the course of image capture. Increasing exposure by a stop doubles the light input, and decreasing exposure by a stop halves it.
On film cameras, stops are still real click-stops on mechanical shutter speed dials and lens aperture rings, but electronic controls have largely robbed the term "stop" of its mechanical meaning on the digital side. But even disembodied stops remain useful because they correspond perceptually to more or less evenly spaced gradations of light and dark. Stops give us an easy way to talk and think about the brain-eye system's final linear response to exponential variations in light input. (The auditory and visual systems both deal in logarithms of input amplitudes.) Film and digital camera designers work hard to emulate this log-linear response so that photographers can rely on their natural sense of tonality. Since stops correspond to powers of two in light input, they're relatively easy to figure in your head. They also nicely scale the effective dynamic ranges afforded by most film and digital cameras in a manageable number of log-linear steps—usually 3-8 stops.
Shutter Speed
Because of the way the exposure duration is actually controlled inside film cameras, the term shutter speed is often substituted for exposure time, but to call for an exposure of 1/250 sec is clearly to specify a duration, not a speed. Strictly speaking, the concept of shutter speed doesn't even apply to the subset of digital cameras with electronic rather than mechanical "shutters", but the terminology is firmly entrenched and will likely remain so. Since exposure varies linearly with exposure time, a stop in speed is simply a doubling or halving of exposure. The shutter speed dials on most 35 mm SLRs come with click-stops at 1, 1/2, 1/4, 1/8, 1/15, 1/30, 1/60, 1/125, 1/250, 1/500, and perhaps even 1/1000 sec and beyond. Many digital cameras emulate this familiar sequence of full stops, and some higher-end digitals like the Oly Camedias insert partial stops as well. Aperture and f-stopsOpening the lens aperture a full stop by definition doubles the amount of light allowed to reach the image receiver, be it film or CCD. Stops of aperture are often called f-stops. Doubling the light input via aperture requires a doubling of the aperture area. For the roughly circular iris apertures still in common use—even in digital cameras—that means opening the iris diameter by a factor of sqrt(2) or ~1.4. F-numbersAperture diameters have come to be expressed as fractions of lens focal length (f), a notation that tremendously simplifies exposure considerations by divorcing aperture designations from the particulars of lens focal length. For a digital lens with an actual focal length of 14 mm, f/2.8 denotes a 5 mm aperture, where the 2.8 is known as the f-number. On a 35 mm SLR with its zoom lens set at 140 mm, f/2.8 means a 50 mm iris opening (that's one reason fast telephoto lenses are so large). The physical iris openings differ greatly in these two examples, but at f/2.8, both lenses make the same contribution to exposure. F-numbers corresponding to full stops are roughly whole-number powers of the square root of 2. In the table below, the f-numbers corresponding to full f-stops appear in bold; the intervening apertures represent the so-called "1/3" and "2/3" stops. For now, the seemingly arbitrary "stop numbers" shown are useful for figuring the number of stops (exposure doublings) between any two aperture settings, but they'll later reappear as exposure values. Note their negative logarithmic relationship to the relative aperture area.
Technical Note: The conventional shutter speeds and f-numbers found in the table and text above deviate slightly from the numbers that would follow from a strict adherence to the physics underlying the table. Whether these minor discrepancies reflect practical conveniences, rounding errors, conventions or something else, I don't know, but no one seems to care. They're now firmly entrenched in photographic practice. Reciprocity and Exposure ValuesOne would like to think that the same amount of light delivered to the image receiver would result in the same exposure, regardless of the rate of delivery. In other words, blasting the receiver with a certain total dose of light in a short time should have the same effect as dribbling in the same dose over a longer duration. This concept is known as reciprocity, and fortunately, it holds up under most circumstances. Reciprocity means that you can safely rely on a perfectly reciprocal relationship between aperture and exposure time: If you open up one full stop in aperture to double the aperture area while halving the exposure time, the resulting film density or CCD charge remains the same. The exposure value table below nicely demonstrates the reciprocity relationship. Using Reciprocity
By reciprocity, f/2 @ 1/500 sec, f/5.6 @ 1/60 sec and f/11 @ 1/15 sec are all equivalent exposures at EV = 11, but only the first would be suitable for stop-action shots at a basketball game. The first two settings could be handheld, but the third would probably fall prey to camera shake in anyone's hands. Reciprocity FailureUnfortunately, for film at least, reciprocity tends to break down at very long (multisecond) and very short exposure times such that greater than expected increases in exposure time become necessary to compensate for a given decrease in aperture—hence the term reciprocity failure. To what extent reciprocity failure might apply to digital cameras, I'm not sure. CCDs are said to be very linear devices, and their exposure-charge curves probably don't have much of a toe. Clipping of the shoulder of the exposure-charge curve at high exposures due to blooming amounts to a reciprocity failure of sorts. So does the draining off of excess photoelectrons to mitigate blooming in many CCDs. Exposure Values (EVs)Exposure values provide a convenient way to quantify available light intensity and therefore exposure. In the Additive Photographic Exposure System EV table below, exposure value (EV) is defined as the sum of the respective stop numbers corresponding to the aperture and exposure time of interest, with one unit of EV corresponding to one stop of exposure.
A bright scene metered at EV 12 reflects more light to the camera than a darker scene metered at EV 8 by a factor of 16, or 4 stops. Conversely, a camera metering a scene at EV 8 is 4 stops more sensitive (requires 16 times less light input for proper exposure) than a different (or differently adjusted) camera metering the same scene at EV 4. The difference in sensitivity in the latter example might well reflect a difference in ISO settings. As available light instensity and therefore metered EV increase, the exposure called for by the meter (i.e., the amount of light to be admitted by the camera) must decrease in order to maintain proper stimulation of the image receiver. In other words, as available light intensity increases, the camera must either stop down the aperture or decrease exposure time or both to avoid overexposure. Note that this standard definition of EV runs counter to the way exposure compensation (EC) controls are typically marked. When you increase EC by +1.0, you're forcing the camera to admit twice as much light as the meter suggested. But that's what the meter would have called for if the scene had somehow darkened by EV -1.0. EV and EC are measured in the same units (stops) but run in opposite directions. Luckily, none of that makes much difference in common practice. What really counts most of the time is what happens at constant EV—the one corresponding to the correct exposure determined by your meter:
This very powerful result allows you to optimize your technique for DOF, resolving power, motion control, tonality or whatever's most important at the scene, without compromising exposure. That's what reciprocity is all about. Using the Additive EV ChartTo get the EV for any given exposure from the chart below, simply add the stop numbers corresponding to the desired aperture and exposure time. Thus, the EV for f/2.0 @ 1/8 sec = 2 (from the aperture column) + 3 (from the time column) = 5. * Technical note: The stop numbers in the table above are actually base-2 logarithms of the reciprocal of exposure time and the square of the f-number, respectively. The addition of stop numbers reflects the fact that
where a is the aperture f-number (again, the 2.8 in f/2.8), t is the exposure time in seconds, and log2 is the logarithm to the base 2. The coefficients and signs in the last version of the equation are simply built into the table for convenience. (For those rusty on their base-2 logarithms, log2 (1/x) = -log2 x, log2 1 = 0, log2 2 = 1, log2 4 = 2, log2 128 = 7, log2 1024 = 10, and so on.) The conventional exposure times and f-numbers listed approximate whole-number powers of sqrt(2).EV ExampleSuppose you select f/2.8 in aperture-priority mode and your camera meters a shutter speed of 1/250 sec. From the table, EV = 3 + 8 = 11 for f/2.8 @ 1/250 sec. Now you can move to any other EV = 11 combination that fits your needs—for example, f/2 @ 1/500 sec for better motion resistance, f/4 @ 1/125 for better resolving power or f/5.6 @ 1/60 sec for greater depth of field—and still get the same exposure. Priority MeteringNote that this constant-EV calculation is precisely what priority metering does for you automatically: The camera meters the scene to determine the proper EV. The firmware then works to maintain that EV as you take control of either aperture or shutter speed to optimize your technique. The biggest risk with priority metering lies in the fact that you can easily and unknowingly take exposure beyond the camera's ability to follow—for example, by setting a fast shutter speed in shutter-priority mode in low light requiring an f/1.4 aperture when f/2 is the widest aperture the camera can deliver. When my C-2020Z's main LCD is on, the parameter I'm controlling turns red when the camera can't hack a suitable setting for the parameter it's controlling. When the LCD's off, I can proceed unaware that the camera's fallen off the wagon.
To guide manual exposures using the firmware's constant-EV calculator, I sometimes duck into a priority mode temporarily to get the camera to work out equivalent exposures for me. Once I see a combination close to what I'm after, I return to manual mode, dial it in, make the necessary adjustments and shoot. I find it well worth the battery hit to keep my LCD and exposure display on whenever I'm using priority or manual exposure. Exposure Compensation ControlsExposure compensation or exposure correction (EC) controls provide an easy way to bias an exposure by 2-3 full stops up or down from the camera's metered aperture and shutter speed, usually in 1/2- to 1/3-stop increments. EC is particularly useful for manual bracketing and for overriding the camera's exposure theory in priority modes, where EC adjusts only the exposure setting left to the camera's control. In auto or program mode, EC again allows intentional under- or overexpose relative to the firmware's exposure strategy, but I have yet to figure out how the bias gets apportioned between aperture and shutter speed in auto mode. My Oly C-2020Z doesn't support EC in manual mode, probably because it doesn't make much sense in that context. What good is EC? For starters, many digital cameras behave like color slide film—the best images are often slightly underexposed, particularly when bright scene elements are present. EC is the fastest and simplest way to underexpose. In bright sunlight, my C-2020Z tends to do its best work at EC -0.3 or -0.7. With EC and a little effort, you can easily feel out your own camera's exposure sweet spots, but count on variation with photographic conditions, as dpFWIW contributor Tom Lackamp details in his take on digital exposure below. In landscape and close-up work, depth of field requirements typically dictate a specific aperture, but what if tonality requires an EV different from the one your camera deems appropriate? If the desired EV is less than 2-3 stops from the meter's EV, EC makes it simple to go there in aperture-priority mode without altering the aperture and without resorting to full manual exposure. Using ECIf you're unfamiliar with EC, the fastest way to learn is to play around with your EC control and watch its effect on exposure settings. (Most cameras display exposure settings on their rear LCDs if nowhere else, but you may need to half-press the shutter release to update them.) Technically speaking, the EC controls in most cameras are calibrated in negative EV units, presumably to avoid confusing the preponderance of owners tempted to use them but unaware of the formal definition of EV. On every EC-enabled camera I've ever seen, digital or otherwise, for each positive unit of added EV, exposure doubles, and for each negative unit, exposure halves. That works for me, but as you run down the standard EV table above, just the opposite obtains—for every positive unit of added EV, exposure drops by a half. Perhaps an example will make this less confusing. Say your camera's in aperture-priority mode at f/4 and the meter sees an EV of 12, which calls for a shutter speed of 1/250 sec for a proper exposure. Since you've fixed the aperture, if you set EC = +1, you'll get f/4 @ 1/125 (double the time, EV = 4 + 7 = 11), and if you set EC = -1, you'll get f/4 @ 1/500 (half the time, EV = 6 + 7 = 13). Still confused about EC vs. EV? Well, at least now you'll feel justifiably so. Exposure StrategiesNow that we've examined the physical basis of exposure and the means for controlling it, let's talk strategy. First of all, there's nothing wrong with using the automatic or program exposure mode in your digital camera—provided it gives you the image you're after. Automatic metering systems in today's cameras are very adept at coming up with reasonable exposures based on available light, various camera settings and known properties of the camera's lens or sensor. But blind acceptance of automatic exposures amounts to playing dice on the artistic, inner vision side of the equation, with the house odds stacked against ending up with an optimum exposure. Of course, an EV different from the meter's is out of the question without intervention.
A Stepwise Approach to ExposureSome master photographers can divine exposures with amazing accuracy without the aid of a meter. Others prefer to rely on calibrated external meters and manual exposure control. For the rest of us, it's perfectly reasonable to use the camera's automatic metering as a starting point—provided one can handle the inevitable exposure trade-offs ahead. Here's the overview from 35,000 feet:
And here's the blow-by-blow approach:
Guiding ConstraintsAs we've already seen, there are many ways to skin the exposure cat. Rather than work off a recipe, learn to make exposure trade-offs to suit your own tastes and further your own photographic goals. To get there, you'll need to
Luckily, the feel will come surprisingly quickly with the instant feedback and freedom to screw up digital photography alone affords. Narrowing the ChoicesExposure decisions can be exceedingly complex, with many variables to juggle. To navigate this jungle of seemingly endless choices, you need a path leading from the scene and equipment at hand to the photo you want to capture—the one that conveys the order and emotion unique to your vision.
To make things a bit more concrete, the discussions below are cast in terms of the camera I know best—the highly malleable 2.1 megapixel Oly C-2020Z. However, the same considerations readily transfer to any digital camera with similar controls and features, including the Oly C-30x0Z. Monitoring Exposure
In all metering modes on the C-2020Z, a half-press of the shutter release with the main (rear) LCD turned on will display the setting(s) you're controlling in green and any settings left to the camera's discretion in white. If the setting(s) you're in charge of turn red, you've brought the camera to its knees—for example, by setting a fast shutter speed in shutter priority mode in low light requiring an f/1.4 aperture when f/2 is the widest the camera can deliver. In all modes but auto, the C-2020Z goes on to underline the offending red setting(s) and beneath that shows an up or down arrow corresponding to the exposure control button you need to use to return to the camera's recommended exposure. In aperture- and shutter-priority modes, this simple check will show you what the camera's coming up with for the setting left to its control—e.g., shutter speed in aperture-priority mode. If the camera's choice in a priority mode proves inconsistent with your goals for the shot at hand, you'll have to
In manual mode, checking the exposure display will show you whether the camera's looking or more or less light or is content with the EV corresponding to your choices. Even program mode displays its choices with that half-press of the shutter button, but I seem to catch on faster when forced to commit to at least part of the exposure decision. Recording Mode—Critical Pre-Exposure Digital DecisionsBefore you even get to an actual exposure, you'll need to set up an appropriate recording mode for your digital camera. Involved are no less than 6 fundamental and largely independent camera settings, each representing an important decision with very real consequences. For the most part, these decisions will be unfamiliar from your film experience, but they're critical nonetheless. The table below summarizes the recording mode settings and the issues at stake.
I think of these 6 settings together as my recording mode. The only one tied directly to exposure is ISO, of course, but the others deserve mention in this context because...
Before taking your first serious digital photograph, it would be a good idea to work through the 6 absolutely irreversible recording mode issues—ISO, color mode, resolution, compression and color interpolation and sharpening—preferably by testing to find what meets your needs. Let the most demanding credible end-uses for your images be your guides. (Remember, digital cameras make testing easier and cheaper than ever before.) Fortunately, you can often fix white balance problems in post-processing—especially when the scene contains something that really is white.
Color ModeThis one's simple.
Recording exclusively in B&W (grayscale), sepia, blackboard and other special in-camera recording modes severely limits all your downstream options with those images. If you have the time, the skill and the right tools, these effects can always be achieved in post-processing, usually with much better results. That's especially true in B&W work. If you lack the post-processing resources or otherwise prefer to record in, say, B&W or sepia mode, I strongly recommend taking and archiving a full color exposure as well. Whatever you do,
Digital ISO SettingsThe ISO setting on a digital camera determines its overall light sensitivity, just as the ISO rating on a film canister informs the photographer of the sensitivity of the film inside. The ability to change light sensitivity at will without physically swapping out the image receiver is one of the more important benefits of digital recording. Of course, digital and film light sensitivities arise from vastly different physical processes, but digital camera engineers work hard to align their ISO settings with established film ISO ratings to preserve the applicability of tried-and-true exposure expectations like the sunny f/16 rule. After all, forcing experienced photographers to relearn exposure on moving to the digital side is no way to sell digital cameras. The manual for my Oly C-2020Z states,
In other words, exact equivalence with film speed (ISO) isn't guaranteed, but for any given scene at any given ISO, the C-2020Z and film will require about the same light input or EV. How close the equivalence comes probably varies from camera to camera (mine acts more like ISO 80 when set to ISO 100, as discussed below), but the potential for discrepancy is by no means unique to the digital side. The true ISO of a given camera-film combination doesn't always match the nominal ISO of the film used. For precision work with external light meters, professionals usually find it necessary to calibrate the true ISO of each different camera-film combination they use. Digital cameras are no different. NoiseThe big difference between digital ISO and film ISO relates to image noise, which is only partly analogous to film grain. To be sure, image noise increases predictably with increasing ISO, just a film grain does, and noise can sometimes look like grain, but once it becomes visible, noise is much more an image flaw than grain. Furthermore, noise can be manipulated in ways that grain can't. To simplify the discussion that follows, I've extended the concept of noise beyond the realm of random time-varying phenomena to include more deterministic but equally undesirable image artifacts like those due to dark current. (No one wants it in their images, but some technically-minded visitors don't consider dark current artifacts true noise. I won't get into that debate here.) In digital photography, the noise of practical interest comes in two flavors—random and fixed-pattern—differing somewhat in cause and remedy. Both types tend to be most problematic in low-light situations. Random noise (RN) arises from
RN varies unpredictably, both in time and across the image frame. Since RN is uncorrelated, it can be reduced effectively by image averaging, a technique well known to CCD astronomers, professional and amateur alike. For every N identical exposures averaged together, the RN-related signal-to-noise ratio increases by a factor of sqrt(N).
To minimize RN, avoid underexposure, keep ISO at the minimum feasible setting and keep your camera cool. If you plan to shoot outside on a cold night, let the camera equilibrate with the cool air beforehand. (Cooling your camera below ambient temperature will invite condensation on the lens and elsewhere, possibly damaging the camera.) Some go so far as to avoid LCD use to keep their LCDs from heating the CCDs nearby, but I have yet to see a compelling case for this practice. If you decide to take several redundant exposures for averaging in post-processing, record them a lossless (TIFF or RAW) format and use a sturdy tripod and a remote shutter release to eliminate any possible camera shake. Fixed-pattern noise (FPN) varies in time but is rooted in inhomogeneities among the CCD sensels and thus exhibits a fixed pattern across the image frame. Dark current noise (DCN), the most commonly visible form of FPN, results when stray electrons leak into sensels from the surrounding substrate in the absence of incoming light. Some sensels leak faster than others, and the longer the exposure and the hotter the CCD, the more dark current electrons a given sensel will accumulate. In low light, dark current electrons may even outnumber the photoelectrons liberated by gathered photons in the leakiest sensels. At constant temperature and exposure time, each sensel's dark current electron load varies randomly about a mean. A dark frame exposed with no light input (e.g., with a lens cap on) will show the instantaneous dark current pattern for a specific temperature and exposure time. An average of several time- and temperature-matched dark frames will approach the mean dark current pattern. Within limits, you can reduce DCN by subtracting dark currents from an image, preferably with an average of several dark frames, as CCD astronomers often do, but you will add some RN in the process.
To minimize DCN, avoid exposures over 1/2 sec and keep your camera cool as explained above. If you decide to take several redundant dark frames for averaging and subtraction in post-processing, record them in a lossless (TIFF or RAW) format on location, taking care to match the CCD temperature and exposure time of the target image. Be sure to use a sturdy tripod and a remote shutter release to eliminate any possible camera shake. Gray Frames Another source of FPN less important in digital photography is variability in sensitivity (the proportionality between captured photon count and output voltage) among sensels. This fixed inhomogeneity can be corrected by shooting a known uniform target several times to obtain an average gray field. Dividing the image at hand by the gray field normalizes sensitivity across the CCD. All-Out Noise Abatement The full court press against noise in post-processing involves the averaging of several redundant images, division of that average by a gray frame and finally, the subtraction of the average of several dark frames, all recorded in a lossless format. ISO, Amplification, Analog-to-Digital Conversion and NoiseDigital cameras adjust their light sensitivity (ISO) in two ways:
Hybrid approaches are probably common here, but either way, the noise inevitably present in the CCD's analog output gets amplified, electronically or mathematically, right along with the signal, and the pre-ADC amplifier adds further noise of its own. Increased sensitivity comes at the price of increased noise, period. For every doubling of ISO, the light input required for a proper exposure drops by a full stop (a factor of 2), while image signal-to-noise ratio (SNR) drops by a factor of 1/sqrt(2) = 71%. Conversely, the required light input increases by 2 stops and SNR doubles in going from ISO 400 to ISO 100 at constant image brightness. The table below shows the quantitative relationship between ISO and time-varying random noise at constant image brightness.
To make matters worse, random noise and fixed-pattern dark current noise both increase with increasing ISO in CCD-based imaging devices. Long multi-second exposures tend to run afoul of dark current noise, even at minimum ISO, and higher ISO settings only compound the problem. See the dpFWIW article Low-light work with the C-20x0Z for details on long exposures with digital cameras. Using ISO WiselyControlling exposure by manipulating ISO in lieu of aperture or shutter speed is generally a bad idea because higher ISO settings beget more image noise, as we've just seen. But ISO adjustments are often inescapable in stop-action work, where short exposures and low available light are a common mix. The increased noise isn't always subtle, but if a higher ISO makes a must-have shot possible, the noise may well be a price worth paying. Image noise tends to be more apparent in the shadows (which may be expendable) and at higher final magnifications, like the ones needed for 8x10 prints (which may not be needed). With forethought and extra exposures specifically designed for the purpose, you can significantly mitigate noise in post-processing in relatively static scenes like the night sky sans moon, but such subtraction and averaging techniques aren't applicable to the short exposures needed for stop-action work, where need to bump ISO issue most often arises. The safest ISO policy is this:
If you dial in a high ISO for a specific purpose, make sure you set it back to your camera's minimum before you forget. Note that some large-sensor cameras like the Nikon D1x and the Canon D30 and D60 deliver very acceptable noise levels at ISO 400 and beyond, but be prepared to shell out big money for that kind of low-light performance. Beware Auto-ISOBTW, keep an eye on ISO in low-light situations in auto-exposure mode. Some cameras like my old C-2000Z take liberties with ISO under such conditions, even though a specific ISO has been set in the menus. Since the C-2000Z otherwise respected my ISO setting, I nearly always used it in aperture- or shutter-priority modes to lock in ISO 100. Thankfully, the C-2020Z and later Oly digitals offer more predictable ISO control options alongside an auto-ISO setting.
Image ResolutionPixel count is by far the single most important determinant of image quality in digital photographs, particularly when it comes to printing, and resolution (e.g., 1600x1200 vs. 800x600) determines pixel count. The higher the resolution, the more pixels you'll capture and the better the image you'll have. A 1600x1200 image contains 4 times the pixels of an 800x600 version and will be commensurately sharper and less "pixelly" at any given print or display size. A 1600x1200 JPEG compressed at 4:1 will contain about as many bytes as its uncompressed 800x600 counter part, but the 1600x1200's quality will almost always be conspicuously superior to the 800x600's at such mild compression levels. In a very real sense, reduced resolution is the crudest possible form of "compression", with results to match. That makes the resolution decision pretty easy:
If you still need convincing, read Higher resolution or lower compression JPEGs? by dpFWIW contributor and physicist Rick Matthews. Rick's illustrations say it all. To avoid the hassle of downsizing images after the fact, some users record images destined for Web use or e-mails to friends at lower resolutions. But what happens when you end up wanting to print an unexpectedly good one at 8x10? Cropping, downsampling and other pixel-wasting operations are best left for post-processing with a specific end-use in mind, and many editors now offer batch processing and macros to automate such tasks. (If you're unfamiliar with these manipulations and the issues they entail, be sure to read John Houghton's excellent image sizing primer.) Bottom line: At exposure time, grab all the pixels you can because...
Memory AllocationMemory card capacity is by far the most important limiting factor here, but recording at full resolution is your single most effective allocation of that valuable resource. Since a 4-to-1 drop in resolution (e.g., from 1600x1200 to 800x600) is usually much more detrimental than a 4:1 JPEG compression, judicious use of compression can more than offset the memory hit that comes with increased resolution—typically with far less impact on image quality and post-processing and printing options. Shot-to-Shot LatencyMany factors affect the time lag between one shot and the next in a digital camera. File write time, the time required to store an image on a memory card once the camera's processed it, is usually the rate-limiting step in getting to the steady green light for the next shot. Write time increases roughly linearly with pixel count and therefore with resolution. In-camera processing times increase with higher resolutions as well. Even though compression itself adds to the processing time, judicious use of compression can more than offset the time increased resolution adds to your camera's shot-to-shot latency. In theory, in-camera sharpening also adds to latency, but I haven't noticed the difference if it does. Image Compression and Color InterpolationDigital image files are inherently large. The true-color (24-bit) images produced by most cameras take up 3 bytes per pixel. With EXIF header information, that comes to 5.5MB for a 1600x1200 image from a lowly 2 megapixel camera! One way to reduce image files to more manageable sizes is to apply compression. With smaller files, you can fit a larger number of images or images of higher resolution on a single memory card. Another way is to record only raw CCD data in-camera, leaving color interpolation and expansion into RGB triples for post-processing. Cameras offering RAW recording also give you the option of performing color interpolation and white balance adjustments in post-processing on a computer with a lot more resources than the one in the camera. Of course, compression and RAW recording aren't exposure issues per se, but like other recording mode settings, they're certainly worth addressing before embarking on serious work with a digital camera. JPEG CompressionNearly all digital cameras offer image recording with the lossy but highly effective JPEG (Joint Photographic Experts Group) compression scheme. The JPEG standard was explicitly designed to compress photographs and other continuous-tone images in accordance with the brain-eye system's well-known ability to detect smaller changes in intensity (luminance) than in color (chrominance). In other words, JPEG compression favors the retention of luminance over chrominance data. JPEG does this very well, but there's a catch: As with any lossy compression scheme, the greater the compression, the smaller the final file size but the greater the data loss, and the more apparent the compression damage when the image is re-expanded. The compression damage takes many forms, all lumped under the term JPEG artifacts. By design, JPEG compression is poorly suited to line drawings and text. GIF and PNG are the compression schemes of choice for such images. Choosing an appropriate JPEG compression level amounts to making the best trade-off between image quality and final image file size based on your most stringent credible end-use for the images at hand. Only you can make that call based on testing with your own equipment. The coming JPEG2000 update of the current JPEG standard promises to do a much better job with wavelet technology, but few cameras now in use will be able to take advantage of it. You can learn more about JPEG compression from this excellent JPEG FAQ page. JPEG Artifacts and Compression LevelsJPEG artifacts are unwelcome image features arising directly from damage done to the original image data during compression and re-expansion. The smaller the final compressed file size, the greater the damage will be and the more conspicuous the JPEG artifacts will become.
Now that you've come face to face with JPEG artifacts, you're probably wondering if the "maximum resolution, compressing as needed" strategy touted above is really all that smart. Once again, I invite you to see for yourself at Higher resolution or lower compression JPEGs? by dpFWIW contributor and physicist Rick Matthews. Very sharp, high-contrast boundaries like those in line drawings and text show obvious rippling and ringing at almost any JPEG compression level. Such boundaries represent the very worst case JPEG scenario, but luckily, they aren't all that common in photographs. (That's why they weren't a priority for JPEG designers.) In routine photographs, JPEG artifacts are most likely to show up as subtle bandings within large low-contrast areas like the sky or as speckles or ripples along color boundaries, particularly diagonal ones. Images with rapid color changes over very short distances also suffer to some extent under JPEG compression. The less image detail, the higher the image quality for a given JPEG compression ratio. In highly detailed scenes with lots of color changes from pixel to pixel, the space actually saved with a given compression level will be greatly reduced. See For Yourself To see the damage for yourself, copy some challenging images from your collection based on the guidelines above, compress the living daylights out of the copies, and then zoom in on the resulting images. Then back off on the compression level to see where the most noxious artifacts first appeared. JPEG OptionsMost digital cameras allow you to set the level of JPEG compression applied, and many now allow you turn it off completely. As with resolution, image quality, post-processing and printing options, memory card capacity and shot-to-shot latency all hang in the balance. Your willingness to change cards frequently enters the equation when compression is disabled, even with large cards. The compression options in the table below are typical of higher-end cameras.
RAW and TIFF RecordingTo avoid JPEG artifacts in your captured images, you'll have to turn to an output file format using either lossless compression or no compression at all. That's where RAW and TIFF recording come in, but be prepared to pay a hefty price in
For some photographers, or for some shots, the TIFF or RAW cost/benefit ratio may make perfect sense, but the fact of the matter is that most digital photographers record JPEGs most of the time. RAW output files contain digitized but otherwise raw sensor data without color interpolation, white balance adjustment or sharpening. In many ways, they represent a "digital negative" and are sometimes referred to as such. Professionals strongly favor RAW recording because it maximizes both post-processing flexibility and final image quality for reasons explained below. Unfortunately, you won't be able to view or edit RAW images straight from the camera with any old image viewer or editor. RAW formats are still quite camera-specific. To convert RAW images to something you can actually work with, you'll have to rely on the proprietary software supplied with your camera. Worse yet, RAW conversions are often quite slow, even on fast computers. What are the RAW advantages? For starters, RAW recording allows you to "externalize" certain basic processing tasks better performed outside the camera. In-camera color interpolation, white balance and sharpening algorithms have to make significant compromises in order to keep shot-to-shot latencies reasonable while working within camera limitations revolving around CPU speed, available RAM and allowable firmware footprint. If you'd rather not be subject to such compromises, RAW recording may be the ticket—if your camera offers it. External color interpolation, white balance and sharpening algorithms running on a desktop or notebook computer can afford to be much more sophisticated (read "more CPU- and memory-intensive"). External algorithms are also free to take their own sweet time since no one's champing at the bit to squeeze off the next shot (although they may well be waiting to get on with their editing). Another RAW advantage is the ability to adjust white balance after the fact. Although RAW files are typically quite a bit larger than the least compressed JPEGs offered, they're usually significantly smaller than the corresponding TIFFs. To make their RAW files even smaller, some cameras, like the Nikon D1x, offer (presumably lossless) RAW compression. Less widely appreciated is the greater dynamic range afforded by RAW recording. RAW sensor data is typically digitized at 10-12 bits per sensel, but JPEG and TIFF images must be requantized to 8 bits per primary color channel during color interpolation. Reduced bit-depth and associated quantization errors mean more blown-out highlights and black-hole shadows, among other artifacts. By post-processing at the higher RAW bit-depth and then saving to an 8 bit per channel file format, significant improvements in final image quality can be realized. Most cameras offering uncompressed or losslessly compressed recording use TIFF (Tagged Image File Format) files for that purpose. TIFFs aren't subject to compression artifacts, but they're very large to gargantuan, depending on the resolution chosen. The uncompressed TIFFs output by my 2MP camera run 4-14 times larger than the corresponding JPEGs! Some cameras record compressed TIFFs, which achieve at most a 2:1 to 3:1 reduction in file size using the lossless LZW compression scheme. Unfortunately, compressed TIFFs aren't as standardized as their uncompressed counterparts and may not be recognized as TIFFs, even by software claiming to support compressed TIFFs. Think of an uncompressed TIFF as the image the camera had right before JPEG compression would have been applied. Color interpolation from the Bayer pattern sensor data has already been performed in-camera. The image has already been requantized to 8 bits per primary color channel. Any white balance settings in effect at exposure time have already been applied. And if in-camera sharpening is enabled, the image will have been sharpened as well. JPEG, TIFF or RAW? The best way to determine the recording format best for you is to test against your own most stringent credible end-uses. If you can live with JPEG recording—and most users can—your digital photography will be greatly simplified on many fronts. Someday cameras may offer losslessly compressed recording in PNG (Portable Network Graphics) format. Until then, TIFF and RAW remain the formats of choice for applications requiring lossless recording. Dialing In JPEG Compression LevelsDon't assume that the image quality gained with less compressed recording automatically justifies the potentially huge memory hit involved on a routine basis. Many C-20x0Z users, myself included, find the moderately compressed 1600x1200 HQ recording mode perfectly acceptable for all but the most demanding applications—even for 8x10 prints. As dangerous as that strategy may be, I generally reserve my least compressed (SHQ) JPEG option for selected shots. Uncompressed (SHQ TIFF) recording has its uses—for example, in dark field subtraction work—but for me, TIFFs take up way too much memory card space for routine work. A professional working in a studio with a stack of large memory cards and the means to unload them quickly into a nearby computer might feel differently, of course, but that's not my MO. In-Camera Image SharpeningBefore leaving the realm of irreversible pre-exposure decisions, be aware that many experienced digital photographers strongly recommend against in-camera image sharpening—at least for shots you'll likely be post-processing. Everyone agrees that sharpening is best saved for the very last step in any post-processing sequence, so why apply it up front in-camera? That said, the sharpening algorithm in my C-2020Z hasn't been an obvious debit with regard to either post-processing or image quality in most instances. I nevertheless disable in-camera sharpening on a routine basis because I don't have a good track record when it comes to picking important shots ahead of time. If disabling sharpening has shortened my shot-to-shot latency, I haven't noticed it. On the C-2020Z, you disable in-camera sharpening by selecting the "soft" setting in the sharpening menu. The "normal" setting turns sharpening on. The C-3030Z added a "hard" option with extra sharpening. The terminology is unfortunate, but at least the control is there. You'll find more on sharpening in post-processing elsewhere on this site. White BalanceEven the most common "white" light sources—the sun, indoor lighting and flash—differ substantially in color composition. These differences are well demonstrated in this Light and Color tutorial. Here at the Earth's surface, for instance, the quality of sunlight varies tremendously with the weather and the time of day: Outdoor ambient light is bluer under overcast skies than it is on clear, sunny days and much redder in the early morning and late afternoon than around noon. Artificial light is even more variable. Incandescent light is quite red, while flash is rather blue. Fluorescent lights generally tend toward the green but vary significantly with the type of lamp — daylight, cool white, neutral white, etc. In fact, the fluorescent color casts are problematic enough to warrant several fluorescent WB presets in my C-5050Z, as shown in the table below. When viewing a scene directly with our own eyes, we tend consider any light with roughly equal primary color intensities as "white" or at least neutral, and we unconsciously correct for subtle biases in the balance of primaries based on expectations accumulated over a lifetime of visual experience. But cameras aren't that smart. The light coming off a scene inevitably carries the color bias of the source. You'll probably be unaware of it at the time, but without help, any camera will faithfully record that bias, and welcome or not, you'll be seeing it in your photographs. (Why the brain-eye readily applies all manner of corrections to our visions of live scenes but not to photographs of them, no one knows, but that's the harsh reality photographers face.) Since any source-related color bias will be most conspicuous in objects that should have been white by human standards, photographers have come to think of this issue as one of white balance, but the real issue is not so much a matter of whiteness as of neutrality.
White Balance ControlsFilm photographers intent on WB control typically have to contend with time-consuming and potentially costly film and/or filter changes, and their options and wiggle room tend to be rather limited. Luckily, digital cameras have largely done away with all that. With digital white balance (WB) controls, compensating for unwanted source-related color biases at recording time can be as quick and easy as navigating a menu. In fact, fingertip WB control is one the truly great conveniences in digital photography. In-camera WB adjustments are made by the firmware when the raw CCD data undergoes color interpolation. If you use RAW recording, you'll have to do your own white balancing in post-processing; otherwise, the camera will do it for you, with or without your help. Gee, It Looked White to MeThe highly effective auto-WB feature built into your own brain-eye system makes it difficult to appreciate the camera's WB struggle. When you behold clean snow or any other surface that your brain expects to be pure white, white is what you see, at least at first glance, regardless of the light source. But cameras record the light they see without making judgements about how things should look. Without some intervention, snow in late afternoon sun photographs with a distinct reddish cast. At times, that may be just the look you're after, but more often than not, pure white is the goal for snow because that's what anyone standing there would have seen. And that's where you and the camera's WB settings come in. Note: Exposing snow and other bright surfaces correctly is an entirely different matter, as discussed below.WB SettingsThe automatic TTL WB systems found in most current digital cameras work amazingly well — well enough in fact to be the default setting for most users — but they're not infallible. Fortunately, many higher-end cameras also offer manual WB settings allowing you to inform the camera about the dominant illumination at hand in tricky situations likely to trip up auto-WB. One such situation arises in external flash (EF) work with the internal flash turned off (EF-IF for short). Disabling the internal flash defeats auto WB in low-light conditions, at least with my C-2020Z. Manual WB (sunny or overcast) is the only sure way to keep EF-IF shots from coming out too blue. Note: If you know of any other conditions likely to make auto-WB fail, please drop me an e-line at dpFWIW@cliffshade.com.WB implementations rapidly have become more and more sophisticated. My 1999-vintage C-2020Z, a star in its time, offered fully automatic TTL WB plus 4 manual WB pre-sets covering the most commonly encountered lighting situations. By late-2002, my C-5050Z had auto WB plus 9 presets plus 4 storable custom WB settings and a manual WB mode, as shown in the table below; even its factory presets are adjustable.
* Table Note: The C-5050Z has no generic fluroescent setting. It's much better than the C-2020Z at correcting fluorescent color casts, but it forces you to learn much more than you ever wanted to know about fluorescent lamps.Note that the named pre-sets all refer to the source of illumination in the scene, with no mention of the scene elements reflecting the light to the camera. That's your cue to select WB pre-sets based on the light source, not on the subject matter. (Don't get locked into the pre-set names, however — the tungsten preset might be profitably applied to any overly red light source.) Now think of the expense and carrying capacity that would tied up in a collection of optical filters capable of neutralizing all the sources listed in the table above. Manual WB — Show Me Something Neutral, And MoreNewer digital cameras like my Oly C-5050Z offer highly accurate "one-touch" WB-by-example features that tap your brain power for the white or neutral recognition piece of the WB equation. A white or gray card carried in your camera bag provides the neutral standard under this "show me something neutral" WB scheme. Since "white" papers actually vary substantially in color, photographic gray cards are safer for this purpose because they're guaranteed to be neutral. Manual WB has other valuable uses. You can warm a shot by showing your manual WB something blue, or cool the scene by showing it something red beforehand. Many digital infrared (IR) enthusiasts use manual WB to manage the sometimes garish false color schemes their cameras would otherwise assign to IR images captured under color recording. (Remember, the concepts of "color" and "neutral" are completely undefined outside the visible spectrum.) WB FallbacksDigital cameras also provide some valuable fallbacks on the WB front:
Getting WB right has never been easier. Sunlight VariationsMost of the variations observed in the color of sunlight at the Earth's surface stem from spectral variations in atmospheric scattering. In clear air, short (UV-A and blue) wavelengths suffer up to 16 times more scattering than longer (red and near IR) wavelengths because scattering efficiency by air molecules (N2, O2, CO2, etc.) varies inversely with the fourth power of wavelength. Direct sunlight here on Earth is yellower (redder and greener) than the light leaving the sun because the atmosphere scatters a good bit of the blue away before the light ever reaches you and your subject. (Yes, some of the scattered blue will eventually scatter back to the surface, but there's still a net loss of blue.) Overcast light is bluer than direct sunlight because visible wavelengths are all scattered equally well by particles the size of condensed water droplets in clouds—hence clouds in shades of gray at midday. Scattered blue light falling onto the cloud tops from above gets tossed back in the mix, now with an even chance of getting to the ground. There's still a net loss of blue, but under overcast skies, it's smaller relative to losses at other wavelengths. Outdoors, shaded areas are illuminated predominantly by skylight, which is quite blue on sunny days and closer to neutral on overcast days. Shaded spots under leafy trees can also pick up extra green light reflected from or transmitted through overhead leaves. In the morning and evening, sunlight takes a much longer path through the atmosphere, losing even more blue and some green to scattering along the way. That's why early and late day sun is redder, and why sunrises and sunsets feature the warm longwave (red, orange and yellow) colors we so admire. Near IR wavelengths suffer very little scattering, even under hazy conditions—hence the incomparable clarity of IR photos. Aerial surveillance photos are commonly made with near IR pass filters to take advantage of this fact. Testing Recording Mode ChoicesOnly you can decide how best to play the JPEG artifact vs. file size trade-off and the in-camera color interpolation and sharpening games. The proper balances depend critically on your equipment and quality needs. Fortunately, digital cameras make the required testing a snap. A simple but useful recording mode test requires 2 sample scenes—one in bright sunlight, preferably with large areas of low contrast, and the other in open shade with richly detailed shadows. Shooting from a tripod using a remote if available, capture each scene with identical exposure settings across the recording modes to be compared. Print the images at constant final subject size to see what's acceptable to you. Pay close attention to
Let the most demanding credible end-uses for your images be your guides. Resolving PowerDetermining and describing the optical quality of a camera lens turns out to be a very complex and highly technical enterprise involving issues of distortion, aberration (primarily chromatic) and resolving power—the ability to distinguish small image features (like line pairs) at small separations. Resolving power depends primarily on
To complicate matters further, these 2 attributes are largely uncoupled—for instance, high marks on sharpness don't guarantee stellar contrast performance. A top-notch lens needs to perform well on both fronts, but that'll cost you. Technical note: The term "resolution" means different things when applied to lenses and CCDs. CCD resolution refers to the sensel count (say, 1600x1200) in the chip's active image-forming area. For optimum camera performance, lens and CCD resolutions must be carefully matched.The issue of resolving power in digital cameras is further complicated by the discrete nature of CCD sensels, but resolving power remains a useful concept when applied to specific lens-CCD combinations. Until digital cameras sporting interchangeable lenses become commonplace, resolving power will remain a property of the digital camera as a whole. Alas, the topic of lens-CCD quality is so complex that widely accepted, easy-to-interpret measures are unlikely to become readily available to prospective digital camera buyers, at least in the foreseeable future. Some of the major digital camera review sites have taken to posting test images based on a bewildering assortment of standard test patterns, but even the experts seem to have a hard time agreeing on how these should be interpreted. Some practical gauge of combined camera-lens resolution is sorely needed. This morass tremendously complicates the process of selecting a digital camera for serious photography, but once you've cast your lot, you can rely on some fairly simple lens-related quality principles to guide your technique. Resolving Power BasicsAperture is the key to resolving power management. Large apertures allow unwanted prism effects to creep in from the edges of the lens, while small openings promote diffraction blurring at the iris. The trick is to find the aperture corresponding to the resolving power sweet spot for your lens and use it whenever you can. Prism effectsIt's an inescapable fact of lens design and manufacture: All lenses perform better at less than wide-open aperture because optical quality inevitably falls off toward lens edges. Chromatic aberration (the focusing of different wavelengths coming from the same subject point onto different points on the image receiver) is one of the most commonly encountered "prism" or "edge" or "off-axis" lens effects, especially in less expensive lenses. Diffraction blurringDiffraction blurring occurs when incoming light diffracts (bends) around the edge of the iris instead of passing cleanly through. For a lens of focal length L, the higher the f-number N, the smaller the physical aperture (L/N) becomes. The closer the physical aperture gets to the wavelengths of visible light (400-700 nm), the greater the bending at the iris and the greater the blurring at the image plane will be. Thankfully, diffraction blurring isn't as damaging to image quality as blurring due to poor focusing, but it's clearly noticeable in most digital cameras at f/8 and smaller apertures. In fact, few digital cameras offer apertures smaller than f/8 for that very reason. At any given f-number, digital cameras are more prone to diffraction blurring than 35 mm cameras. The reason boils down to image receiver size. The 8-10 mm diagonals typical of consumer-grade digital camera CCDs are small compared to the 43 mm diagonal of the 35 mm film frame, and small digital diagonals require lenses with very short focal lengths — typically in the 5-20 mm range. At a wide-angle zoom setting of 5 mm, a digital f/8 exposure calls for a tiny physical aperture of 5/8 = 0.625 mm. The same shot with a 35 mm camera would involve a physical aperture of around 24/8 = 3 mm. That's why current consumer-grade digital camera lenses are said to be diffraction-limited. Expect this to change only when physically large CCDs approaching the size of the 35 mm film frame become affordable, but don't hold your breath. Resolving Power Sweet SpotOK then, how does resolving power bear on exposure strategy? Practically speaking, resolving power peaks at the aperture(s) striking the best balance between diffraction blurring and off-axis effects. Like many a 35 mm camera lens, the f/2.0 lens on my 2.1MP C-20x0Z reaches maximum resolving power at ~2 full stops down from wide open — i.e., around f/4 at wide angle and f/5.6 at full zoom. For the slightly faster f/1.8 lens on my 5.2MP C-5050Z, informal testing suggests a resolving power sweet spot around f/2.8 to f/4.
Table notes: These handheld 388x238 crops came from otherwise unedited 2560x1920 SHQ JPEG images taken in landscape program mode at full wide-angle zoom (FL = 7.1 mm) with in-camera sharpening disabled at -5. Differences in detail capture are best appreciated when viewed at 200-400%. Thanks to Tom Lanckamp for the idea of using chain link fence as a resolving power test target. Next time, I'll use a tripod and remote control to eliminate any blurring due to camera shake.Even at relatively wide f/2.8 to f/4 sweet-spot apertures, I usually end up with DOF to burn — near that of a 35 mm camera at f/22! Better yet, the attendant fast shutter speeds are good insurance against camera shake, which remains my No. 2 photographic nemesis — right after my woeful lack of creativity. Since diffraction blurring gets particularly nasty at f/8 and smaller apertures at current CCD sizes, I try not to go there now, but I sure wish I'd known that when I first went digital.
Not surprisingly, Program mode usually pursues a very similar strategy in both the C-2020Z and the C-5050Z, but both cameras seems to settle on f/2.8 more often than f/4. (Hmmm, maybe they know something I don't.) Yes, Digital Lens Quality MattersDon't fall into the trap of thinking that you can scrimp on a digital camera with a cheap lens just because the CCD's pixels are a lot coarser than the silver halide grains in film. Many digital photographers have come to realize that image quality can easily become lens-limited, starting somewhere between 1.5 and 2.1 megapixels (MP). Lens quality clear counts at 3.3MP and above. The designers behind the emerging crop of 2MP cameras with very long, very sharp electronically stabilized zoom lenses like the new Oly C-2100UZ and the Sony Cybershot DSC-F505 may well be zeroing in on a sweet spot where field flexibility, image sharpness, low-light performance and file size all come together quite nicely. These new-generation 2MP cameras promise to give 3MP offerings with lesser lenses a run for their money. Depth of Field (DOF)Technically, focus is perfect only in a single plane, which presumably coincides with some part of the subject. In practice, however, focus appears acceptably sharp to the brain-eye system for some distance in front of and behind the plane of true focus. This range of acceptable focus is called depth of field (DOF). Relative to the camera, the nearest plane of acceptable focus is called the near limit of DOF and the farthest plane, the far limit. These boundaries are seldom equidistant from the plane of true focus. In hyperfocal technique, for instance, the near limit may be at 3 feet, the plane of true focus at 6 feet, and the far limit at infinity. It's important to distinguish DOF from the locations of its near and far limits. DOF is the distance between the near and far limits. An important rule of thumb pertaining to non-close-up work states that if the subject occupies a constant portion of the frame, DOF will also remain constant, even though the near and far limits shift substantially as one goes from a close-in wide-angle shot to a telephoto shot from afar. DOF is further complicated by the fact that DOF and its near and far limits all vary somewhat independently with aperture, magnification, focal length and, of course, with the definition of "acceptable focus". The last is usually specified as the diameter of the largest acceptable circle of confusion, which can be thought of as the image of an imperfectly focused point image projected onto the true focal plane. Working with DOFAchieving a DOF encompassing just the elements that need to be in focus is always an important goal in photography, digital and film alike. To match what the eye sees, landscapes generally require a very large DOF including both near and distant scene elements. In this arena, digital cameras deliver DOF film photographers can only dream of. In close-ups, even digital cameras struggle to provide the DOF to cover a single flower, let alone the background, but film cameras struggle much more. In portraiture, however, the worm turns. DOF is often purposely reduced to help separate in-focus subjects from their less important blurred backgrounds. For film photographers, limiting DOF is easy, but digital photographers find it a struggle. These consistent differences in film vs. digital DOFs flow directly from differences in the sizes of the image receivers typically involved: Most digital sensors are much smaller than 35 mm, medium format and large format film frames. The Road AheadThe remainder of this lengthy and rather complicated section will cover
We'll tackle these topics one by one in the order listed. Determinants of DOFFor close-up work (when camera-subject distance is small relative to the hyperfocal distance), DOF varies directly with aperture f-number and even more strongly and inversely with magnification, which depends in part on focal length. With more distant subjects, focal length comes directly into play as well. Focal length plays a critical role in DOF considerations, so we'd better get our signals straight. Often, we'll need the actual focal length (f) of the lens or zoom setting at hand. For digital cameras, actual focal lengths typically fall in the 5-20 mm range. When taking advantage of relationships long ago worked out for 35 mm cameras, however, we'll sometimes need to express focal length as the equivalent focal length (f35, EFL) of a 35 mm camera. Because the 35 mm frame is 2-5 times larger than most digital camera image receivers (CCDs, CMOS sensors, etc.), the values of f and f35 usually differ substantially for a given camera. For the 3x zoom lens in my Oly C-5050Z, f (actual focal length) = 7.1 - 21.3 mm, while f35 = EFL = 35 - 105 mm. Using the wrong version in a formula involving focal length is likely to generate a large error. ApertureAt any camera-subject distance, the narrower the aperture (the larger the f-number), the greater the DOF. For close-ups, DOF doubles for every 2 stops of decreased aperture.
Unfortunately, opening up the short focal length lens in a digital camera won't always limit DOF enough to achieve good subject-background separation via selective focus. MagnificationMagnification is the strongest single determinant of DOF, as discussed further below. The greater the magnification, the less DOF you'll get. Technically, magnification is defined as
where f is the actual focal length (not the 35 mm EFL) and So is the distance from the front principal plane of the lens to the subject. Of course, f and So must be in the same units. Practically speaking, it's often simpler to think of magnification in terms subject size relative to the image frame.
How magnification affects DOF depends to some extent on camera-subject distance So. In close-ups at fixed f-number, DOF varies inversely with M2 and is effectively independent of focal length. Thus, halving subject size as seen in the image quadruples DOF. At longer camera-subject distances, the relationship between DOF and magnification becomes more complex, but they still vary inversely. Regardless of focal length and camera-subject distance, it's always true that
Whether you keep your frame filled with a flower or a mountain, DOF will remain the same whether you're close in at wide angle or farther away at full zoom. Focal LengthAt constant magnification M and f-number N, a shorter lens will tend to have a narrower near DOF and a wider far DOF than a longer lens, but total DOF will be about the same. In close-up work, focal length has little effect on DOF proper, but when distant picture elements come into play, focal length enters in two important ways:
Close-ups aside, at fixed aperture and camera-subject distance,
On the digital side, you can generally count on more DOF than you're likely to need at all but the widest apertures, thanks to the small CCDs and very short lenses found in most consumer digital cameras. The C-20x0Z's 8 mm diagonal CCD and 6.5-19.5 mm zoom lens are typical in this regard. Putting It All TogetherAt last, the short answer on the factors determining DOF:
where "þ" means "proportional to" and "~þ" means "roughly proportional to". Mathematically, for any lens,
where
To calculate DOFLnear, use the "+" in "±" in the equations above; the "-" gives DOFLfar. A zero or negative denominator means that DOFLfar has become infinite. Of course, all lengths must use the same unit, typically millimeters. A particularly useful reformulation of the DOF limit equations emphasizing the influences of focusing distance So and focal length f, DOFLfar = So / [h1 / (So - f) - 1] DOFLnear = So / [h1 / (So - f) + 1] assumes that h1 is known, perhaps from a table or from a previous special-case calculation like the one behind A Simplified Hyperfocal Technique below. Digital DOF Rules of ThumbThe DOF limit (DOFL) equations above can be mined for practical DOF insights applicable to all cameras:
Since So » f almost always holds for digital cameras based on small CCDs and CMOS sensors, the DOF limit equations simplify to DOFLfar = So2 / (h1 - So) DOFLnear = So2 / (h1 + So) at which point some very useful digital DOF rules of thumb come into view:
Note, however, that all these relationships become far more complicated in close-ups where So » f no longer holds. Acknowledgements: Much of this section is adapted from David Jacobsen's photo.net Lens Tutorial. Thanks also to Anatoli ?? for finding some initial errors in the discussion above, and for recommending an emphasis on the DOF reformulations based only on distances.Limiting DOFFilm photographers working with 35 mm SLRs often go to great lengths to extend DOF, but in digital work, the real challenge often comes in limiting DOF to achieve selective focus—e.g., to separate the subject from the background in a portrait by blurring the background. For an interesting discussion of the power of selective focus, see Tony Spadaro's Sharp Enough for You? essay. At the SceneTo separate subject and background by blurring the latter in-camera, apply these measures alone or in combination:
* These tricks take advantage of the fact that
If you can't back off, try using macro focusing if you're close enough to your subject. Post-Processing for Selective FocusNote that some digital photographers prefer to ignore DOF at the scene and blur the background in post-processing. Jeff Drabble of New Zealand described his method on RPD:
I have yet to try background blurring in post-processing, but I hear that it's not for the beginner. Some claim that they can easily spot "fake" blurred backgrounds, but others like Jeff find the effect very realistic with the appropriate effort and technique. Other Means of Separation
These separation approaches can be just as effective as selective focus but tend to be even less straightforward in their application. Magnification RulesMagnification is at once the most important determinant of DOF and the easiest to overlook in practice. Since it plays heavily into composition via both subject size and perspective, it merits a little individual attention here. DOF and MagnificationTry to keep these important magnification and camera-subject distance relationships in mind:
PerspectiveLet's pause for a moment to examine the surprisingly complex trade-offs encountered in the camera-subject distance versus zoom decision. Bear in mind that perspective changes dramatically as you move in and out, even if you zoom to maintain subject size relative to the frame. At constant aperture and subject size, DOF won't change, but the closer in you are, the shorter the focal length required, the wider the resulting angle of view and the smaller background elements will appear relative to the subject. The greater sense of depth imparted by the close-in, wide angle perspective may well offset at least some of the subject/background separation lost to excessive DOF on the digital side. Moving away from your subject and zooming back in affords a narrower, more compressed perspective with greater blurring of out-of-focus background elements. These effects can also be quite valuable, but the longer the lightpath between subject and camera, the more your image may suffer from atmospherics—dust, haze, thermal currents, etc. Also, the longer the focal length, the greater the risk of camera shake, particularly in handheld shots.
With this many variables in the mix, how best to play the distance vs. zoom game can vary considerably from one shot to the next. Faces are usually much more attractive in portraits taken through a long lens from some distance, and you may achieve better background separation to boot. Wide-angle shots from close in tend to have more punch. Beyond that, you'll have to use your judgment regarding perspective. If your digital camera has a zoom lens, spend some time getting a feel for these trade-offs. Time will be your only cost, and the experience will be worth a thousand words. Relating Digital to 35 mm Camera DOFAnother excellent digital DOF reference is Andrzej Wrotniak's Depth of field and your digital camera page. Andrzej tells me that his DOF calculations match his experience with an Oly C-3030Z quite well. Leveraging Film Experience with DOFFor those already familiar with the relationship between aperture settings and DOF in 35 mm cameras, Andrzej has discovered a handy DOF conversion rule that applies to many currently available 2-5 MP digital cameras:
Thus, at its f/4 aperture sweet-spot, my C-20x0Z's DOF equals that of a 35 mm camera at f/22! Like I said, DOF to burn. Technical Note: Andrzej's DOF work assumes a circle of confusion of D/1440, where D is the effective CCD diagonal—in Andrzej's case, 8.94 mm. See below, however, for a discussion of circle issues in digital photography.
Hyperfocal TechniqueHyperfocal ChecklistWhen it comes to shooting wide-angle landscapes with lots of foreground interest (flowers, friends, etc.), you often need the closest possible near limit of DOF and a far limit reliably at infinity. The manual focusing method known as hyperfocal technique is designed to give you just that. At the heart of hyperfocal technique is the hyperfocal distance, the distance to the nearest plane of acceptable focus when the lens is focused at infinity. This is the distance h1 already encountered in the DOF calculations and digital rules of thumb above. As we saw there, a camera focused manually at a distance So = h1 brings everything from h1/2 to infinity into acceptable focus. At wide-angle focal lengths, hyperfocal distances fall close enough to the camera to allow a distant ridge, a flower a few feet away and everything in between to be in good focus at once. What You'll NeedTo take advantage of hyperfocal technique in your landscapes, you'll need
The following sections will help you get going. Technical Note: Of the two definitions of hyperfocal distance in common use, I prefer the one David Jacobsen adopts in his superb photo.net Lens Tutorial. His definition is used throughout this article.A Simplified Hyperfocal TechniqueHyperfocal ChecklistHere we'll work out an easy-to-use wide-angle hyperfocal technique appropriate to your digital camera. If you already have a well-established circle of confusion value (c) for your camera's image sensor, you're ready to start. If not, you may have to wade into the circle of confusion quagmire that follows this section before proceeding. Establishing Your Own Simplified Hyperfocal SettingsTo hammer out a simplified hyperfocal method for any particular camera,
Now you're ready to put your tested hyperfocal settings to work. Simplified Hyperfocal Technique in the FieldTo use hyperfocal technique in the field, just follow these steps:
That's all there is to it. Determining Your Sensor's Circle of ConfusionThe circle of confusion right for your camera depends largely on the properties of its sensor. If you don't have a reliable value for c, try c = D/1260, where D is the sensor's diagonal in millimeters. (Sensor dimensions are often given in the specifications listed in your camera's manual. Failing that, look up your camera in the side-by-side section at Digital Photography Review.) Alternatively, try the circle associated with the sample camera from the table below best matching your sensor's type and maximum resolution. If you're ready to delve into the many ways one might reasonably determine c for a digital camera, take a deep breath and click here.
In these samples, focusing at h1s brings everything from slightly over half a meter to infinity into acceptably sharp focus — from the flowers at your feet to the mountain on the horizon. Manual Focus Via Auto-focusEstablishing an accurate manual focus at the hyperfocal distance (in this case, h1s) is critical to the success of any hyperfocal technique. Failure to do so may result in blurring of your closest or farthest subjects, if not both, especially if you happen to focus too close in. If your manual focus scale is as inaccurate and difficult to interpolate as mine (on both the C-2020Z and the C-5050Z), you might try Andrzej Wrotniak's autofocus (AF) trick for the C-5050Z if your camera has similar features.
If that doesn't work for your camera, do anything you have to do to get an accurate manual focus at h1s. Departing from fmin, Ns and h1sNow that you have a workable but highly constrained hyperfocal technique in hand, it's worth knowing how to stray from it safely. The hyperfocal equation h1 = f2 / (N * c) points the way. Luckily, anything that decreases h1 can be done safely without departing from the So = h1s manual focus setting determined above. Narrowing the aperture (increasing N) is the cleanest example. Mounting a wide-angle converter to reach a focal length below fmin might also qualify, but note this lens-related caveat before relying on it. Now for the bad news.
If you stay focused at So = h1s, any adjustment that pushes h1 out beyond h1s puts both near and far focus at risk. Because it's squared in h1 = f2 / (N * c), focal length will always be your tightest constraint. Without a fully offsetting increase in N, zooming in beyond the fmin used to calculate your h1s is a sure recipe for disaster if you're still focused at h1s. Note that doubling f would require an offsetting 2-stop (four-fold) increase N to keep h1 at h1s! Opening up the aperture also pushes h1 away in inverse proportion to N. If you're still focused at h1s, both near and far focus can be lost at N > Ns. Note that h1 doubles for every 2-stop (twofold) decrease in N. Finally, at fmin and Ns, focusing at So > h1s will maintain distant focus, but the near limit of DOF will move out accordingly, and your closest subjects may well end up blurred — hence the importance of an accurate manual focus at h1s. The only real hyperfocal implementation challenge on my C-2020Z and C-5050Z cameras are their highly inaccurate and nonlinear manual focus distance scales. Dialing in 1.14 m between the 0.8 m and 2 m marks requires an act of faith. To work around the scale on his C-5050Z, Andrzej Wrotniak uses automatic focus to establish an accurate focus on a test object at the So before transferring the result to manual focus, as summarized above and described in detail at Use Your C-5050Z/C-5060WZ Like a Leica.
This strategy maintains distant focus at the expense of the near limit of DOF, but stepping back a few feet to accommodate the latter usually beats moving up a mile to get that distant ridge back in focus. Note that the "pan-focus" hyperfocal mode built into the 3MP Canon PowerShot G1 (see Fini Jastrow's description below) eliminates such manual focus uncertainties. The G1 uses hyperfocal settings similar to those shown for the 3MP C-30x0Z and achieves similar results. Technical Note: All hyperfocal calculations in this article assume (1) symmetrical lenses (p = pupil magnification = exit pupil / (entrance pupil = 1) and (2) a subject-to-lens distance So many times the actual focal length (i.e., So >> f). These are probably a good bets for your digital zoom lens, but they're not guaranteed, particularly with regard to p. If you can't find a workable value of c for your camera, p may be less than 1 at fmin. A wide-angle converter might also make p < 1. The hyperfocal distance notation h1 used here serves as a reminder of the p = 1 assumption. With typical digital camera focal lengths of 20 mm or less, the approximation f « So almost always holds up in the field. For a more general treatment of DOF allowing for asymmetric lenses, see Paul Van Walree's photography & optics.
Hyperfocal CalculationsFor so-called symmetrical lenses with equal entrance and exit pupils (generally all but wide-angle lenses), hyperfocal distance depends on focal length, aperture and the desired degree of sharpness according to
where
Once again, all lengths must use the same units, usually in mm. You can calculate the constant FLR35 = f35 / f for your camera's main lens at any zoom setting for which you have reliable data relating f35 and f — e.g., from your camera's lens specifications. Note that FLR35 depends only on sensor diagonal and therefore on sensor type. For the 1/2" type CCD in the C-2020Z, FLR35 is 5.385, while it's 4.923 for 1/1.8" type CCDs in the C-3030Z, C-4040Z and C-5050Z. In fact, for most currently available 2-5MP cameras, FLR35 is reasonably close to 5. Technical Note: When f « So, FLR35 then reduces to 43.3 / D, where 43.3 mm is the diagonal of the 35 mm camera frame and D is your effective sensor diagonal in mm. With typical digital camera focal lengths of 20 mm or less, the approximation f « So ( So > 10 * f is good enough) would break down in practice only in extreme macro shots, if then.Sample Hyperfocal Table for the Oly C-2020ZThe table below gives sample hyperfocal distances for my C-2020Z calculated from h1 = f2 / (N * c) and a reasonable c = 0.0093 mm from the discussion below.
Whether the table produces accurately focused images remains to be seen, but at least I've shown my work. As soon as I figure out a workable and reliable method, I plan to test these numbers in the field. The major stumbling block is the very non-linear manual focus scale of unknown accuracy found in most Oly C-series cameras. I may have to calibrate the scale first, and that'll take some doing.
Andrzej Wrotniak has posted DOF tables for several Oly C-series and E-series cameras based on a D/1440 circle of confusion. See, for example, his worthwhile article Depth of field and your digital camera. Andrzej states that the calculated distances stand up to his field testing. Pick a Circle, Any CircleIt's easy enough to generate hyperfocal distance tables like the one above with a spreadsheet and the standard hyperfocal equation h = f2 / (N * c). Generating a table that actually yields properly focused images is another story. The hard part is choosing the right circle of confusion (c), the standard measure of "acceptable sharpness" in photographs. I won't go into a precise definition of c here, but it's basically the diameter of the circular image that an imperfectly focused point subject would form at the image receiver plane. You'll find good discussions in David Jacobsen's photo.net Lens Tutorial. Note that having a realistic value for c is a necessary starting point in any DOF calculation, hyperfocal or otherwise. Film photographers have developed a number of workable circle of confusion rules, all ultimately tied to the diagonal of the image receiver considered to be continuous in nature. These include working backward from end-use quality requirements taking c as a fraction of the frame diagonal D — e.g., c = D/1440 using c = f/1000, where f is either the normal or actual focal length approaches. Unfortunately, they all yield different results. On the digital side, the discrete sensels (light sensing elements) of the CCD or CMOS sensor, the anti-aliasing filter applied to the sensor, and the color interpolation and sharpening schemes eventually applied to the image data all potentially complicate the choice, but few treatments of digital c values tackle those complications head-on. To my knowledge, the only circle of confusion rule unique to digital photography is the twice sensel size rule discussed below. It is also the only rule that doesn't rely on the sensor diagonal. The End-Quality ApproachThe most straightforward approach to establishing a circle of confusion diameter (c) is to work backward from desired output image quality to find the c required. We'll take as our output image a 10x7.5" (4:3) print with a diagonal of 12.5" or 318 mm, and for the moment, we'll ignore pesky printing details like desired number of pixels per inch. The human brain-eye system considers a print sharp when c is magnified in the final image to no more than 0.25 mm (0.01"), the width spanned by the eye's maximum angular resolution of ~2 arc minutes at a viewing distance of 430 mm (17"). Details measuring 0.25 mm or less can't be resolved at 430 mm or farther out, whether blurred or sharp, but if you anticipate closer viewing, c will have to be commensurately smaller at the camera end. Now let's calculate the magnification M necessary to produce our 10" print. The diagonals of most consumer-grade 4:3 CCD and CMOS sensors fall in the 8-11 mm range, with the 8.94 mm diagonal of 1/1.8" type 3-5MP CCDs being perhaps the most common as of 2Q2004. To reach the 318 mm diagonal of our final print, we'd need to magnify the CCD diagonal by M = 318 / 8.94 = 35.5x. And to end up with a magnified circle of confusion of 0.25 mm on paper, we'd need to start with a 0.25/35.5 = 0.0070 mm = D/1272 circle at the CCD. We'd get the same c value for 1/1.8" type 5.2 MP CCD in my Oly C-5050Z because its diameter equals that of the 1/1.8" type 3.3MP sensor. Thus, for all 1/1.8" type sensors,
where c and D without subscripts refer to the sensor. Encouragingly, this c value is very close to the 0.0071 mm circle Canon adopted for the "pan-focus" hyperfocal mode built into its G1 digital rangefinder. It also happens to be very close to twice sensel size (0.00354 mm) for the G1's 1/1.8" type 3.3MP CCD, but it's considerably larger than the twice the sensel size c value of 0.0056 mm for the 1/1.8" type 5.52MP sensor. Note that this end-use approach depends solely on the viewing circle demanded for the print and the ratio of print and sensor diagonals, with no implicit or explicit reference to sensel count. The Printer FactorNow, all of this would be fine and dandy for a film print, where the effective pixel size is the ~1 micron diameter of a silver halide or dye grain. But what about digital prints? A 10" print from the G1's 3.3MP sensor would have a maximum horizontal resolution of 2046 pixels and a printer resolution of 2046 / 10 = 205 ppi (pixels per inch). Those who insist on 250-300 ppi for their prints would consider such a 10" print to be limited by its printer resolution — more perhaps than by quality of focus. With a 1/1.8" type 5.2MP CCD with the same diagonal, the required circle would stay the same, but now we'd have a horizontal resolution of 2560 pixels and a 10" print resolution of 256 dpi. At 256 ppi, small deviations from acceptable sharpness due to focus should be visible. The "f/1000" ApproachMany other circle of confusion approaches are possible. Let's continue to ignore the untidy digital complications and forge a circle now using a widely-accepted film-based "f/1000" approach. I have reservations about the general applicability of this approach on the digital side, but for now, let's see where it leads. For any photographic format, the venerable Kodak Professional Photoguide states,
Note that the "normal" qualifier effectively ties the chosen c back to the image receiver format. Kodak freely applies this approach to formats ranging from 35 mm to 8x10 inches, so why not take it into the digital realm? Technical Note: The Ilford Manual of Photography, the British analog to the Kodak Professional Photoguide, propounds a slightly different 1/1000 rule based on the true focal length of the lens at hand, not necessarily the normal lens. This yields an elegant result: h = 1000 * d = 1000 * f / N, where d is the physical diameter of the aperture. As attractive as that is, I'm sticking with the Kodak approach for now.For 35 mm SLRs, fnormal is commonly taken to be 50 mm. Assuming that fnormal for a CCD is just 50 mm / FLR35, then for my camera's 2.11MP Sony CCD with effective diagonal D = 8.0 mm,
This is the circle of confusion underlying the hyperfocal table above. It's a little over twice the CCD's sensel size (0.0039 mm), but it nicely fits the manual focus DOF charts published in the manual for my old C-2000Z, which uses the exact same lens and CCD as my C-2020Z. (The C-2020Z manual has no DOF charts for some reason.) To the extent that Oly determined these charts empirically, they lend support to this 0.0093 mm circle estimate for the 2.11MP Sony CCD and any camera that uses it. The "twice sensel size" ApproachSome propose twice sensel size as a reasonable guess for c in any digital camera on the assumption that the manufacturer has matched lens resolution to CCD geometry in an optically and economically sound way. Canon's G1 pan-focus circle of 0.0071 mm = D/1239 is very close to twice the sensel size of 0.00345 mm. The 0.0093 mm = D/860 circle I've tentatively adopted for cameras using the once ubiquitous original 2.11MP Sony CCD is 19% greater than twice sensel size (0.0078 mm), while the 0.0063 mm = D/1280 CoC derived by working backward from a 10x7.5" print is 19% smaller. Note the substantial difference in these circles when expressed as a fraction of diagonal. Note that this is the only approach I'll discuss that takes into account the discrete nature of a digital image receiver, and it does so only via sensel size. At constant sensor diagonal and aspect ratio, it is inversely proportional to the horizontal effective sensel count. Data Point: The Canon G1 Pan-Focus Circle for Sony's 1/1.8" 3.3MP CCDA valuable manufacturer-based digital circle of confusion data point comes from the Canon PowerShot G1, which by all accounts uses the same Sony 1/1.8" 3.3MP CCD found in Oly C-30x0Z cameras. Since the G1's "pan-focus" mode is nothing more than a built-in hyperfocal technique, its factory-programmed settings can be used to divine Canon's idea of a proper circle for its CCD. Fini Jastrow of Hamburg, Germany kindly wrote:
To my mind, Fini's analysis establishes 0.0071 mm = D/1239 as the circle to beat for the many cameras using the same 1/1.8" 3.3MP CCD. But does it also apply to other 1/1.8" CCDs with higher sensel counts? I'm not prepared to say at this point, but my gut favors the twice sensel size approach over circles determined solely by CCD diagonal. Confusion Is the Operative WordCircles of confusion generate all kinds of confusion on the digital side. To my mind, the central question remains: Do conventional film-based approaches to circle choice really apply to an electronic image receiver like a CCD with discrete sensels coupled to an internal anti-aliasing filter, a Bayer pattern color interpolation scheme and a sharpening algorithm applied (sooner or later) to recover detail lost to the anti-aliasing filter? None of these digital complications have direct analogues on the film side. Since I have yet to see a convincing treatment of their bearing on digital c values, I'm not prepared to ignore them; nor am I knowledgeable enough to deal with them head-on. Film-Based CirclesNot that there's any real consensus on how to choose a circle of confusion (c) on the film side. Film photographers variably calculate c as a fraction of D, the frame diagonal of the film format at hand, or from one or another f/1000 rule with widely varying results. The 0.03 mm circle most commonly used in DOF calculations for 35 mm photography corresponds to D/1440, but some favor the more stringent 0.025 mm = D/1730 criterion championed by Zeiss, at least for more demanding viewing situations. Assuming the eye to be capable of at most 2 arc minutes of angular resolution on a print, as is commonly done, the D/1730 circle guarantees acceptable sharpness in a 10-inch print of a 35 mm negative at viewing distances as close as 12 inches, while the D/1440 circle pushes you back to 14 inches.
On the digital side, the twice CCD sensel size, D/1440 and D/1730 circles all allow viewing of a 10-inch print made with either CCD from at worst a very reasonable distance of 19-20 inches. The end-use approach incorporates a larger print circle that allows viewing from 17 inches. Errors due to pixellation in consumer-grade CCDs typically fall within even the D/1730 circle, as they do for all of the CCDs shown here, but that doesn't take into account the smearing of scene information that goes on with internal anti-aliasing filters, Bayer pattern color interpolation and image sharpening. These influences would tend to increase effective circle size. DOF graphs published in the Oly C-2000Z manual suggest an effective circle of confusion nearly twice the D/1440 circle. My DOF guru Andrzej Wrotniak finds that the D/1440 circle works well enough for his C-3030Z, but it's ~14% smaller than the D/1239 circle Canon figured for pan-focus (hyperfocal) mode for the same 3.3MP sensor. Note also that all the fnormal / 1000 and diagonal-based circles are identical for the 3.3MP and 5.2MP sensors. Doesn't the smaller sensel size count? That kind of scatter leads me away from any circle approach based solely on CCD diagonal. I'm equally leery of approaches based on focal length because they also ultimately tie back to the frame diagonal. The fnormal / 1000 approach happens to yield a reasonable result for my 2.1MP camera but doesn't jibe with the circle Canon uses for the G1's pan-focus feature. But wait! The common 35 mm film circles in the last 3 rows of the table above are all over the map for 35 mm film as well! Could it be that circle choices don't matter that much after all? Film photography is a mature technology with many knowledgeable and exacting practitioners. If one of these film-based circle approaches were a clear winner for 35 mm film, you'd think practice would have settled on it by now. In the End, c is EmpiricalUltimately, the correct choice of c is an empirical matter intimately tied to the intended end-use of the image. The "correct" circle is the one that yields an acceptably sharp image (say, a print of a certain size viewed from a certain distance) when used to guide manual focusing in the field, as in hyperfocal technique guided by a hyperfocal distance table calculated from that circle. If the near and far limits of DOF end up acceptably sharp when you focus at the calculated distance and view the final image in the required manner, then the circle worked. If the distant horizon comes out blurry, then it didn't. If you really need a reliable circle for your camera, and you have a sufficiently accurate manual focus interface, then your best bet would be to pick a series of candidate circles based on the considerations above, test them all against your most important end-uses, and narrow it from there, as detailed above. Acknowledgement: Many thanks to Andrzej Wrotniak and Fini Jastrow for their technical help here. Motion ManagementMotion happens. Image-stabilized cameras can sense and to some extent compensate for camera motion, but no consumer-grade still camera I know of can deal with motion occurring within the scene. So it's still largely up to the photographer to manage motion's tendency to blur the image in a proactive manner. A little blur may impart a beneficial show of movement in an image with a mountain stream, but most of the time, motion artifacts are to be eliminated. Motion happens on both sides of the lens.
Let's look at each type of motion separately. Camera motionYour efforts to minimize noise and optimize DOF and resolving power will come to naught if your images are blurred by camera shake—the camera motion that accompanies the act of taking an exposure. In handheld shots, the main source of camera shake is the wetware—the photographer. Human photographers can only hold so still for so long, and can only release the shutter so gingerly. Good technique and practice can improve steadiness on both counts, but there will almost always be an available shutter speed too slow for handholding. When handholding proves infeasible, an solid camera support is in order. Supports come in many forms—tripods, monopods, bean bags, nearby rocks and logs—each with pros and cons. But even with a solid tripod, a heavy finger on the shutter release can result in visible camera shake, and that's where remote triggering comes in. Some higher-end digital and film cameras now come with IR remote controls ideal for eliminating this last vestige of shake. In 35 mm SLRs, vibrations generated when the viewfinder mirror flips up out of the way can also cause visible camera shake, even with a sturdy tripod and remote triggering. Fortunately, most digital cameras lack internal moving parts with such momentum. SteadinessWhen steadiness counts and you're the only camera support around,
The 1/f35 RuleTo improve sharpness in handheld shots,
For example, at 105 mm (full zoom on my C-20x0Zs), keep shutter speeds faster than 1/105 sec. See the stop-action section below for tips on getting the fastest possible shutter speeds. Know Your LimitsGet a feel for your own handholding ability—before it counts. With a digital camera, learning your own handholding limits will take only a few minutes of your time. The 1/f35 rule of thumb works for most 35 mm photographers, but since weight dampens shake and digital cameras weigh considerably less than most 35 mm SLRs, it may be wise to work on the conservative side of the rule. Your own handholding limits may differ considerably in any event, depending on age, caffeine load, proximity to tax time, etc. Bracket for Shake, Too
Stop-ActionHow fast a shutter is fast enough to stop motion? That depends on the subject's speed and direction and the final magnification of your lens. Here's a handy ballpark formula modified for digital camera use:
where the subject's speed is in miles per hour, distance to the subject is in feet, the subject's direction is
and f35 is the 35 mm equivalent focal length (EFL). If you can't get a fast enough shutter speed at ISO 100, you may need to bump ISO and pay the price in image noise. This is the one instance I can think of where my C-2020Z's auto-ISO feature makes some sense, particularly when the desired action is hard to see coming. For a price, large-sensor digital cameras like the Nikon D1x and the Canon D30 and D60 are very well suited to stop-action work in limited light. They make faster shutter speeds feasible by delivering very acceptable noise levels at ISO 400 and beyond. When you're really pushing shutter speed to the limit in shutter-priority or manual metering mode, make sure the camera can follow you there with a reality check of the exposure display usually found on your camera's rear LCD. It may well save you from an underexposed mess, as explained above. For subjects within flash range in limited ambient light, flash can often freeze motion more effectively than a fast shutter. If ambient light is high enough, a slow shutter flash sync technique may be appropriate. PanningFollowing a moving subject with the camera to freeze its motion against a blurred background is an important action technique known as panning. The background blur heightens the sense of subject motion. In limiting light, panning may be your only option with extremely fast-moving subjects like racecars at speed. I won't go into detail on panning techniques, but I will offer these pearls:
Handheld panning is challenging but workable with practice. A tripod with a panning head reduces the number of degrees of freedom you have to control at exposure time. TimingFreezing the action is one thing. Catching the right moment is another. In action photography, anticipation is a requisite skill requiring considerable practice. The required rhythm varies from event to event. With a digital camera, on-the-scene practice and feedback are very helpful. In limited light, auto-ISO can free you up to concentrate on your timing, but use it very carefully. As with any auto-focus, auto-exposure camera, the time between pressing the shutter release and exposure can be unexpectedly long and variable on digital cameras, but these potentially fatal delays and uncertainties can be reduced to manageable levels, at least with most higher-end digital cameras. Learn to deal with your camera's timing issues beforehand. For an excellent illustrated discussion of digital action photography stressing timing and the importance of minimizing shutter lag, be sure to visit Kevin Björke's Canon G1-oriented Shooting Action with the PowerShot. It's well worth a read for any digital photographer. Dynamic RangeHigh-contrast scenes can easily exceed your camera's effective dynamic range—the range of light intensities your CCD can record without complete loss of detail in either the highlights or the shadows. Technical Note: There are many possible definitions of dynamic range, some quite technical and some applicable only to the CCD itself. Here, I'm sticking to the effective dynamic range experienced by the photographer in the field. In zone system parlance based on a 0-10 scale, it's the number of stops of metered light intensity separating the bottom of Zone 2 from the top of Zone 8 in a single high-contrast scene. I've seen effective dynamic range (DR) estimates of 2-8 stops for digital camera. Photographically speaking, that ranges from dismal to excellent, respectively, but even 8 stops pales before the truly phenomenal effective dynamic range of the human brain-eye system, which can accurately record detail in single scenes with light intensities ranging over a factor of ~30,000 or ~15 stops. Excess ContrastLight intensities in natural scenes can exceed a factor of 2,000 or 11 stops. Human vision can easily handle such spreads, but good color slide film can barely capture an intensity factor of 32, or 5 stops. Some digital cameras and B&W films approach 8 stops. Little surprise, then, that DR issues underlie many a large discrepancy between what the brain-eye sees and the camera records. DR mismatches are all too common in photographic practice, particularly on bright sunny days, when the highlights are very bright and the shadows very deep. The gap between real and recordable contrast levels amounts to excess contrast. The task of managing excess contrast falls to the photographer. Ignoring it is a sure recipe for burned-out highlights, black-hole shadows, or both. Tough ChoicesIn the face of excess contrast, you may find detail sacrifices impossible to avoid, even with the best of technique. But one thing's certain—letting the camera decide what to do about excess contrast is very risky. If you decide what detail to preserve and what to let go and take steps to effect those choices, you have a much better chance of approximating with the camera's effective DR what the brain-eye sees. Reliable rules are hard to come by here, but generally speaking, with digital cameras,
This approach may well exacerbate visible noise in the shadows—and, of course, nothing can be done about completely black shadows—but noisy shadows are usually much less obtrusive than the alternative white-outs, which have no cure. This thoroughly digital excess contrast strategy runs counter to the film-based zone system maxim, "Expose for the shadows and develop for the highlights", as discussed below, primarily because CCDs saturate much less gracefully than most films do. For one thing, blooming of saturated CCD photosites (sensels) into adjacent ones only makes white-outs more obvious. To minimize blooming, most modern CCDs drain off "excess" photoelectrons before they can spill over (bloom) into adjacent photosites, but these drains effectively clip the signal at the high end. BloomingNo discussion of excess contrast in digital photography would be complete without an explanation of the digital artifact known as blooming well illustrated here. If you reserve the term "noise" for unwanted time-dependent random signal variations, as most engineers do, blooming isn't really noise, but it's a fatal image flaw nevertheless, with no generally satisfactory post-processing cure. Each sensel (photosite) in a CCD is like a bucket. Incoming photons knock electrons from the chip substrate into the bucket, at which point the electrons become "photoelectrons". When the CCD reads off the image, it simply measures the free charge—counts the photoelectrons—in each bucket. However, when overexposure overfills a bucket, excess photoelectrons spill over into adjacent buckets, which then register artifactually increased photoelectron counts. That's how blown-out highlights spread or "bloom" into adjacent image areas. Modern CCDs run gutters between the buckets to drain off excess photoelectrons, but the gutters aren't always effective, so you still have to manage digital exposures actively to avoid blooming in predisposing situations. Blooming is aggravated by long exposures and by physically small sensels, which overflow sooner than larger ones. Since in-camera meters often average their readings over areas considerably larger than the highlights subject to blooming, you can't trust your meter to avoid blooming. Exposure compensation (EC) is a handy way to override the meter to keep blooming at bay. If you're not sure how much negative EC to dial in, bracket like crazy. With a digital camera, it's free, and eventually you'll get a feel for it. Speaking of free, it's all too easy to generate blooming and play around with it. Just set your camera for auto exposure and shoot the full moon in a dark sky or a bright lamp in a dark room. Do UV and IR Contamination Contribute to Blooming?Some believe that UV and IR contamination contribute to blooming in visible light digital photographs near overexposure. IR-induced blooming sounds like a plausible explanation when my IR-sensitive Oly C-2020Z blows out certain red flowers in bright sunlight, but an IR cut filter doesn't correct the problem. In conjunction with high-order lens aberration, UV-induced blooming might conceivably play a role in the "purple fringing" artifact seen in certain unusually UV-sensitive cameras like the Canon PowerShot G1 and Canon IS Pro90 shooting close to overexposure, but I remain unconvinced. Advanced Post-Processing for Excess ContrastFortunately, digital imaging offers effective post-processing solutions to the excess contrast problem, including
Image BlendingIf all else fails, you can take 2 otherwise identical exposures of your high-contrast scene 2 or more stops apart and blend them in post-processing. One exposure preserves the shadow detail and the other the highlight detail you're after. A tripod and remote triggering are required to insure exact image registration. Max Lyons' blended images beautifully illustrate the striking results blending can achieve. Michael Reichmann's superb blending tutorial details the blending process in PhotoShop 5.5. (If you're starting with properly aligned digital camera images, skip over the scanning and aligning steps 1-11.) Peter iNova's PhotoShop blending tutorial takes another effective approach that doesn't involve Reichmann's complex selections but still requires precise registration of redundant images—in this case, 3 images exposed at -2, 0 and +2 EC settings. I find iNova's tack more appealing for routine use. Finally, Fred Miranda's linear gradient approach mimics the effect of a graduated neutral density filter. Contrast Masking and Channel MixingOther Reichmann tutorials pertinent to excess contrast control in post-processing include contrast masking and channel mixing, the latter for B&W images. These techniques are generally less effective than image blending but don't require multiple perfectly registered exposures. If you forgot your tripod, give these a whirl. Spot MeteringSpot metering narrows in-camera metering to a small central region marked in the viewfinder. It allows selective metering of high-priority elements in your scene to insure proper exposure. With spot metering enabled, my C-2020Z meters a 3-9° solid angle, depending on zoom setting. To take full advantage of spot metering,
* Warning: Since a half-press of the shutter release locks both exposure and auto-focus in program and priority modes on many digital cameras, "dragging" an exposure reading from one part of the frame to another may jeopardize focus when the areas involved aren't the same distance from the camera. Of course, all this is easier said than done, and it wasn't all that easy to say. Narrowing the Spot with ZoomIf you can't spot-meter selectively on a small subject at wide angle, try zooming in on it first. On my C-2020Z, spot meter coverage narrows from ~9° to ~3° as I zoom from full wide angle (1x, 35 mm) to full zoom (3x, 105 mm). Once the reading's in hand, zoom back out for the shot. Fill FlashA dark backlit subject against a bright background is a common photographic challenge. With averaged or matrix metering, you're likely to underexpose your subject, possibly with severe loss of detail. Spot-metering the subject alone will help you expose the subject properly, but background detail may suffer greatly in the process. If you can't rearrange the lighting but you're within flash range, you can narrow the scene's dynamic range by forcing on your flash to add light to the subject. This technique is known as fill flash, and it's a role your camera's otherwise rather limited onboard flash plays fairly well. Many current cameras like the C-2020Z provide fill flash automatically when auto-flash is enabled. Unfortunately, fill flash has its disadvantages:
Luckily, these shortcomings can often be avoided entirely or substantially diluted with... Ambient Light ReflectorsOne or more strategically located diffuse reflectors can pump ambient light into your shadows in a natural-looking way without disturbing the dominant color temperature of the scene. The more diffuse the reflected light, the less shadowing and spot-light effect you'll get. Reflectors can be used in lieu of or in conjunction with fill flash. There are many reflector designs on the market (see, for example, www.cameraworld.com or www.bhphoto.com). White poster board works well, but it's awkward to carry. (I'm experimenting with a compact crinkly Mylar "emergency blanket" that folds up to fit in my medium-sized camera bag, but proper support is an on-going challenge.) With reflectors, a patient and willing human accomplice can be very helpful. Filtering Excess Contrast SelectivelyGraduated neutral density filters and polarizers can reduce excess contrast by selectively filtering highlights under certain circumstances discussed at their respective links. Filters can be used in combination with spot metering, fill flash and reflectors to help you manage excess contrast. In combination, knocking down highlights and filling in shadows become even more effective at reducing the scene's contrast—hopefully to a level the camera can handle. Testing Your Camera for Effective DRTo my testing, my Oly C-2020Z has an effective DR of ~7 stops. This result jives with the 1 stop per zone effective C-2020Z DR implied in an August, 2000 digitalFOTO magazine article on the application of zone system techniques to B&W work on that camera. Using a different test method documented here, Max Lyons came up with ~8 stops for his Nikon CoolPix 990. Peter iNova's image blending tutorial quotes an 8.8-stop dynamic range for Nikon compact digital cameras like the CoolPix 990, but he doesn't reveal how he arrived at that number. These digital DR results compare favorably with the generous DR of good B&W film. I no longer consider them a spurious reflection of the 8-bit analog-to-digital conversion these cameras perform on their CCD outputs. The oft-repeated claims that digital cameras have "limited" effective DRs clearly don't apply across the board. Based on a 7-stop DR, I now work off a 1 stop per zone tonality chart similar to the sample chart below, so far without a hitch. Measuring Your Own Effective DRIf you plan to pursue tonal control with or without the zone system, you'll need to make your own tone-versus-exposure table. With a digital camera, the required calibration has never been easier. I cobbled together my own direct single-image effective DR test using a highly sophisticated textured high-contrast target—a white corrugated cardboard box containing a dark green terry cloth towel. I turned one side of the box squarely toward the February afternoon sun so as to place the towel inside the box in deep shadow. I shot the entire target in a single frame like so:
Careful spot-metering at full zoom confirmed a reproducible spread of 7 full stops between the deepest shadow on the towel and the sunward side of the box. (I probably could have widened the gap by performing the test at high noon during the summer with a black towel, but the spread obtained proved adequate for this test.) In a single image exposed at f/8 @ 1/100, the highlights and shadows barely retained recognizable detail confirmed with histogram analysis. In zone system terms, they fell at the top of Zone 8 and the bottom of Zone 2, respectively:
I'm now satisfied that the C-2020Z runs very close to 1 stop per zone. * Technical Note: I first attempted to measure my Oly C-2020Z's effective dynamic range (DR) using a medium gray terry cloth towel as a finely detailed target, with fixed ISO 100, fixed sunny white balance, manual exposure, tripod, IR remote triggering and flash disabled. Here's what I found:
Suspicious that I might be measuring the camera's 8-bit analog to digital conversion rather than effective DR, I went on the the single scene test described above.Tonality
Photographically speaking, tonal variation or tonality refers to the range and distribution of light and dark in a scene or in a grayscale (B&W) or color image. Tonality can be an extraordinarily powerful visual element, as anyone struck by an Ansel Adams B&W photograph will attest. On the digital side, galleries like
beautifully demonstrate the fruits of taking control of tonality. Digital tonal control begins at the scene with pre-visualization of the final image to be produced and ends in post-processing. Due to dynamic range limitations in both humans and cameras, tonality and preservation of detail go hand-in-hand: The more extreme the tone, the less detail can be seen within it. In fact, concern over detail often drives the exposure decision, particularly with regard to highlights and deep shadows. Post-processing adds fine tuning and the opportunity to accommodate tonal ranges well beyond the dynamic range of the camera, as noted above. Technical note: Film developing methods similarly extend the dynamic range of film, but largely in the opposite direction. With film, you generally expose for the shadows and develop for the highlights; with digital recording, you assiduously avoid blowing out the highlights and bring up the shadows as needed in post-processing.
Metering for Medium ToneTo begin to understand and exert tonal control, you must first become one with this immutable fact of photographic life:
That's right—follow the meter's advice, and your metered target will end up a medium tone, no matter the color and no matter how light or dark it might appear in the flesh. Believe it or not, that turns out to be a very reasonable approach to metering—once you learn to make it work for you instead of against you. The first step is to know what a medium tone looks like, since that's what the meter's dishing up:
According to John Shaw, the best reason to carry a gray card is simply to have a reliable medium-toned comparison at hand. Tony Sparado's The Gray Card tutorial ends up saying the same thing. The Gray Card ApproachIf your meter's so obsessed with medium tones, why not give it one? If you meter off a known medium-toned sample held in the light illuminating your subject, everything in the frame in that same light will be, technically speaking, properly exposed. Objects in the frame receiving more or less light than that will be over- or underexposed accordingly, but your subject will be taken care of. Many serious photographers carry an "18% gray" or "medium gray" card for just this purpose. See Tony Sparado's The Gray Card for an entertaining tutorial on using one effectively. The New York Institute of Photography also offers a worthwhile gray card tutorial.
Gray cards are getting hard to find these days, even in high-end photography shops, but there are many workable substitutes. If your printer is properly calibrated, you can print one yourself from a gray fill set at RGB(127, 127, 127). The average Caucasian palm is about one full stop lighter than a gray card. Don't look now, but your camera bag may well be medium-toned, too. The Spot-Meter ApproachThe gray card approach just described in effect keys on the lighting in the scene, but it's not always feasible to meter off a gray card in the light bathing your subject, particularly if that light is far away or otherwise inaccessible. (What's the chance of that bird allowing your assistant to hold a gray card next to its head?) A less exact but far more flexible approach based on spot-metering keys instead on your knowledge of subject reflectance and the tonal range available in your digital camera. Bracketing can easily make up for the uncertainties involved. Making this approach work is the thrust of the remainder of this section on tonality. In challenging situations, the gray card and spot metering approaches can be combined. Getting Whiter Whites and Blacker BlacksIf you spot meter on fresh snow and use the exposure indicated by the meter, the snow will turn out medium gray, not white. To end up with the bright white snow you know you saw that day, you have to overexpose the snow. Many find this approach counterintuitive at first, but the same applies to any white or near-white object, as this cala lily series illustrates. Exposure compensation is usually the simplest way to pull this off. Conventional (film-based) photographic wisdom advises 1-2 stops of overexposure to keep white snow white, but on the digital side, that may be too much, particularly for cameras with limited dynamic range. Just how much overexposure to dial in is best determined by bracketing, but be sure to base your bracketing on a spot metering of the snow. If you meter the entire scene and include dark elements like pine trees, your may end up with blown-out snow highlights at well under a stop of overexposure. For more examples, see the table of subject-based exposure tweaks below. What About Colors?Colors are equally subject to the medium tone imperative. If you meter the dark green canopy of a conifer forest and don't intervene, it'll end up medium green. But with a 1-stop underexposure, the captured green will probably match your perception at the scene. Manual vs. Priority ModesOn a malleable camera like the Oly C-2020Z, these calculated over- and underexposures relative to meter indications can be executed
The much more convenient priority/EC approach limits you to ±2 stops of departure from the meter, but if your camera realistically has only 4-5 stops of effective dynamic range, that may be all you need. Working Off the Medium ToneUnhelpful as it might seem, the meter's fetish with medium tones turns out to be just the rigid framework needed to build a rational scheme for tonal control at exposure time. Think of it as your place to stand when you play the exposure game. Here are the basic building blocks as I see them:
Let's tackle these tonality control measures one by one. First Do No HarmIf you don't know a medium tone when you see one, you run the risk of making unnecessary exposure tweaks leading to unwelcome results. If your subject is medium-toned and you'd like to show it that way, there's no need to override the meter—at least not on that account alone. As noted above, the best reason to carry a gray card is to have a reliable medium-toned comparison at hand, but any known medium-toned object will do. Your camera bag may well fill the bill. Adjust for Desired TonalityTo control tonality, you'll also need a way to gauge departures from medium tones and to estimate the exposure adjustments needed to reproduce them. For this purpose, it's useful to divide tone and detail levels into a manageable number of discrete steps ranging from featureless black to featureless white, and to relate these steps to deviations from meter readings in stops, as in the sample tone vs. exposure table below. Photographers often refer to such tonal steps as zones. Note that these gradations and stops will apply to shades of gray and colors alike. For a camera with a 5-stop effective DR, a +2-stop adjustment in the snow example above would have "placed" the snow on an "extremely light" tone (Zone 9), as illustrated in the table below. Likewise, metering a red car and adding a stop of exposure would render it a light red (Zone 7). Reducing exposure by 2 stops would produce an extremely dark red rendition of the same car (Zone 1). However, you'd have to use proportionately larger exposure corrections to achieve the same results with a camera with a wider effective DR.
In this table, the ½ stop per zone deviations from a medium-toned (Zone 5) metered exposure add up to a 5-stop effective DR—one typical of color slide film. However, many B&W films and at least some digital cameras with effective DRs of 7-8 stops run closer to 1 stop per zone. Testing is the only way to know how to relate zones and stops for your camera. Balanced Tonal ControlKeep in mind that adjusting exposure to render one object in a certain tone can have a negative impact on other image elements. Shadow and highlight details are most at risk. To guard against trashing detail you'd like to preserve, consider this 4-step approach to tonal control based on a tone-exposure table like the one above.
* Note that the desired target tone in Step 1 doesn't have to match your perception at the scene. As long as the fallout remains tolerable, you're free to choose any tone that strikes your fancy. The Zone SystemIn the 1930s, legendary B&W photographer Ansel Adams invented the zone system—an elaborate but spectacularly successful tonal control method for negative film. For starters, his approach demanded meticulous calibration of all components of the photographic process, from lens and film choice through exposure to paper selection and development technique. Application in the field required pre-visualization of the final image—in Adam's case, the B&W print—followed by careful juggling of the exposure to realize the desired print. Since then, the zone system has been extended to other photographic arenas, including color transparency film and now digital capture systems. For more details on the zone system in B&W digital photography, see the excellent August, 2000 digitalFOTO magazine article cited here. The ZonesTo codify tonality and simplify exposure calculations, Adams divided the tonal ranges he wished to target in his photographs into 9 distinct zones he numbered with Roman numerals I-IX. The zones are distinguished on the basis of tone and texture. Many zone practitioners now recognize 11 zones numbered 0-10, as shown in the table below: Table Note: I've abandoned Roman numerals to simplify my own zone thinking. The Romans never used zeroes, anyway.Whether you settle on 9 zones or 11, the critical piece of the puzzle is a realistic number of stops per zone for your camera, and that relates directly to its effective dynamic range—here the number of stops of exposure separating the top of Zone 8 from the bottom of Zone 2. Exposing an object according to its spot meter reading amounts to placing it squarely on Zone 5, the medium tone with which the meter is obsessed. To place it on Zone 8 and turn it into a highlight instead, you'd have to override the meter and increase exposure by 8 - 5 = 3 times the number of stops per zone your camera provides. Through the judicious adjustment of exposure based on spot meter readings, Adams could "place" snow "on Zone 9" or a shadowed rock with detail to be preserved "on Zone 3" to achieve a pre-visualized tonal range in his final B&W print. Zoning RequirementsAdams succeeded in reproducing his tonal pre-visualizations only by virtue of his meticulous preparation, which included careful calibration of his lenses, cameras, films, developing processes and photographic papers. With the testing came the predictability that made his pre-visualizations attainable. What You'll Need To Get StartedFortunately, you don't have to adopt the zone system whole-hog to benefit from its most important principles, as we'll see in the next few subsections. To get started, you'll need
The second item will allow you to make your own zone vs. exposure table. Only then can you manipulate tonality in a predictable way. With a digital camera, it's relatively easy to construct such a table based on the simple DR testing procedure described above. Full-Blown ZoneOn the exposure side, full-blown application of the zone system requires an expensive narrow-angle (preferably 1°) external spot meter. Calibration of camera ISO to the external meter is an essential first step. On the printing side, thorough zone technique will involve the testing and calibration of monitors, printers, inks and papers as well. Such matters are currently well beyond my experience. The Zone Dictum Turned Upside DownFor negative film, the zone system is often neatly summarized in the dictum "Meter for the shadows, develop for the highlights," but that hardly does justice to a method that by all accounts takes years of patient practice to master. With negative film, desired shadow detail sets an exposure floor. Exposing above that floor increases aperture or exposure time with concomitant reductions in DOF and motion suppression—typically with little other gain in the shadows. Dialing in the highlights can generally be left to the development process. The Digital CeilingThe film-based zone dictum turns out to be bad advice when it comes to CCD cameras, which handle high exposures with considerably less grace than negative film. Nasty CCD behaviors like blooming and the draining off of "excess" photoelectrons when sensels get "full" effectively truncate the upper end of their otherwise fairly linear charge-exposure (characteristic) curves. Thus, to avoid complete loss of highlight detail,
In other words, desired highlight detail sets a ceiling on digital exposure. You then bring up the shadows as needed with gamma adjustments or the more sophisticated tone curves found in advanced editors like PhotoShop and PHOTO-PAINT. You may well make shadow noise more conspicuous in the process, but that's usually preferable to glaring blown-out highlights. More advanced post-processing techniques addressing dynamic range are discussed above. Editing tools can always be used to tweak tonality after the fact to good advantage, but keep in mind that
That's the No. 1 challenge once you take charge of tonality. Pre-visualization is the KeyIn the field, zone system technique begins with a pre-visualization of the final image to determine which scene elements belong in which zones. With a digital camera, highlights with detail to be preserved must go to Zone 7 or Zone 8, as discussed above. An exposure consistent with all the desired zone placements must then be concocted based the number of stops per zone the camera provides. Efforts to reduce excess contrast may be necessary to reach a workable exposure solution. I can't improve on Bob Hickman's excellent zone system tutorial Using the Zone System in the Field, which nicely illustrates the concept and practice of pre-visualization. Manual Exposure Rules of ThumbCollected here are a number of tricks to get you in the ballpark with exposure. If nothing else, they're useful cross-checks on the accuracy of your camera's TTL metering system and ISO settings. The Sunny f/16 Rule, Digital StyleWhen close-ups aren't involved, film photographers find the "sunny f/16" exposure rule fairly reliable:
where ISO is the film-camera system's true ISO rating. Add a stop for a sidelit subject. Note again that the true ISO of a particular film-camera combination and the nominal ISO marked on the film aren't any more likely to match than a digital camera's true and nominal ISO. "Correct exposure" in this context means that a medium-toned subject like an 18% gray card will appear medium-toned in the resulting photograph. At ISO 100, this amounts to an EV of 14.6. By reciprocity, any aperture and shutter speed yielding EV 14.6 satisfies the rule. The Digital VersionTo the extent that digital ISOs equal film ISOs, the same EV 14.6 rule applies to digital cameras as well. But since the diffraction-limited lenses found in most consumer digital cameras generally preclude f/16 apertures, a reciprocity-adjusted digital version would be handier:
In other words, your meter should give something equivalent to f/5.6 @ 1/800 sec on a clear sunny day for a medium-toned frontlit subject if your camera's ISO 100 setting is accurate. Set at a nominal ISO of 100, my Oly C-2020Z consistently wants the equivalent of f/5.6 @ 1/650 sec. I take this to mean that its actual ISO is closer to 80 when it's set for ISO 100. I haven't tested the sunny f/5.6 rule with other cameras. If you do, I'd love to hear how it works out at dpFWIW@cliffshade.com. BracketingWhen in doubt, take exposures on either side of your best guess. This safety measure is known as bracketing. The Blacklocks (full citation here) recommend bracketing for exposure by 2/3 stop. Assuming you're not more than a stop off the mark to begin with, this will leave you no more than 1/3 stop away from the ideal with only 2 extra shots. Priority modes and exposure compensation (EC) controls make bracketing a snap. My Oly C-2020Z even has a flexible auto-bracketing feature that can be set to take 3-5 shots covering up to 1 stop above and below the current exposure in even steps, but EC makes exposure bracketing so easy, I haven't felt a need to try it. Bracketing's Not Just About ExposureThe bracketing habit has served me well. So well, in fact, I've found it very useful to extend the concept to other practical photographic issues like steadiness, resolving power, white balance, tonality, filters, conversion lenses and even composition—especially in macro mode. With enough time, memory and battery power along, the marginal cost of another shot or ten is zero. I'm still far from being able to predict which shot will come out best with any reliability. Tonality Tweaks
Now that you're attuned to tonality, here are some exposure adjustment guidelines gleaned from books by John Shaw and the Blacklocks (click here for full citations):
Before committing to any of these suggestions, be sure think through the consequences for all the other important elements in your scene. Bracket as needed. Advanced Digital Exposure ConsiderationsIn response to one my many attempted brain-pickings, dpFWIW contributor Tom Lackamp wrote of the exposure challenges shared by slide film and digital photographers, here in the context of intentional underexposure in flower photography:
Tony's observations ring true in my own experience with digital photography. Editor's NoteThe exposure display on my digital camera has taught me a lot about exposure. I've come to consider the camera firmware a handy portable collection of exposure tables—not the last word, mind you, but a valuable reference and usually a good place to start. Thanks to the freedom to experiment and the instant feedback that digital photography alone affords, I'm developing the feel for exposure that always seemed to elude me with film, and I'm now embarking on a fairly relaxed venture into the realm of tonality beyond the camera's one-size-fits-all theory of exposure. Editorial: The Proper Role For Rules
In this article's lead-off section Who's In Charge Here?, capturing the photographer's inner vision was held up as the ultimate goal in any serious photograph. Coaxing the equipment to join you in that vision often involves considerable craft, but without a mastery of the rules of photography and their limits, the craft often comes up short. Bits of photographic wisdom that might come across as "rules" are everywhere in this site, and particularly in this article, so let's talk for a moment about the proper role for rules. Of the many definitions of the word rule listed in the Merriam-Webster Collegiate Dictionary, two are particularly pertinent:
The latter comes a lot closer to the way good photographers use rules, but I'd like to offer to two alternative definitions of rule:
I emphasize the word trade-off above because at bottom, all photographic rules are trade-offs. They help you gain or avoid something, invariably at the expense of something else likely to be less valuable under the circumstances. Rules hit their limits when that something else ceases to be expendable. Taking rules beyond their limits can easily do more harm than good. To avoid rule backfires, you must first understand exactly what's at stake, and that comes only with study, experimentation and practice—all of which are rather painless on the digital side. Once facile with the rules and their limits, you'll be in a position to judge whether the inherent trade-offs take you toward or away from your inner vision of the scene. Breaking the RulesSlavish devotion to rules without acknowledging their limits is asking for trouble and seldom leads to art, but flaunting photographic rules firmly rooted in the underlying physics is usually a recipe for disappointment if not disaster. Ignoring the "softer" rules relating to composition, lighting and the like may or may not work out in a given situation, but you have more wiggle room there. When in doubt, go beyond the rules to revisit the underlying trade-offs. With a digital camera, testing the limits has never been easier. When time or circumstance keeps you from following the rules, you get what you get. You may end up with a real keeper, flaws and all, but more often, you get a mess. (Many a famous photograph owes at least some of its charm to happenstance, but such successes are hard to build on.) Not surprisingly, the knack for judicious rule-breaking that marks a good photographer seems to come to those most in touch with their inner vision and the spirit rather than the letter of the rules. Acknowledgment: Thanks to Bob Ingraham, Dave Martindale and many others for insightful RPD posts that helped to crystallize and refine some of the thoughts expressed here.References and Links(See also the home page links.) Kodak Guide to Better Pictures—an online version of the authoritative and comprehensive Kodak Professional Photoguide available in hardcopy from amazon.com. The online guide covers 35 mm film photography, but a lot of the information applies to DP as well. Shaw, John, Landscape Photography, AMPHOTO, New York, 1994. Depth of Field and Hyperfocal TechniqueDepth of Field—Tony Collins' excellent online tutorial includes a downloadable, customizable Excel-based interactive DOF graph. Depth of field and your digital camera—Physicist Andrzej Wrotniak's useful and well-written piece includes DOF tables for the Oly C-30x0Z. How to Use Hyperfocal Distance—a worthwhile New York Institute of Photography technical reference article. Lens Tutorial—David Jacobsen's superb technical review of lenses for photo.net elucidates and quantifies many issues affecting exposure. Zone SystemCicada's Welcome to the Zone System—Lewis Downey's thorough introduction to the rationale and practice of Ansel Adams' zone system for tonal control. Using the Zone System in the Field—Bob Hickman's excellent zone system tutorial with an emphasis on pre-visualization. Unless explicitly attributed to another contributor, all content on this site © Jeremy McCreary Comments and corrections to Jeremy McCreary at dpFWIW@cliffshade.com, but please see here first. | |||||||||||||||||||||||||||||||||||||||||||||||||||||||||||||||||||||||||||||||||||||||||||||||||||||||||||||||||||||||||||||||||||||||||||||||||||||||||||||||||||||||||||||||||||||||||||||||||||||||||||||||||||||||||||||||||||||||||||||||||||||||||||||||||||||||||||||||||||||||||||||||||||||||||||||||||||||||||||||||||||||||||||||||||||||||||||||||||||||||||||||||||||||||||||||||||||||||||||||||||||||||||||||||||||||||||||||||||||||||||||||||||||||||||||||||||||||||||||||||||||||||||||||||||||||||||||||||||||||||||||||||||||||||||||||||||||||||||||||||||||||||||||||||||||||||||||||||||||||||||||||||||||||||||||||||||||||||||||||||||||||||||||||||||||||||||||||||||||||||||||||||||||||||||||||||||||||||||||||||||||||||||||||||||||||||||||||||||||||||||
![Sweet potato in tall grass, Washington Park, Denver, CO; EC -0.7, polarizer. Click to see 800x600. [C-2020Z]](http://dpfwiw.com/images/sweet%20potato-m.jpg)
![Low-light view of San Francisco Bay showing random noise in dark areas. Click to see 800x600 version. [C-2020Z]](http://dpfwiw.com/images/rn.jpg)
![Long (4 sec) exposure of the crescent moon and Mercury showing fixed pattern noise.. Click to see 800x600 version. [C-2020Z]](http://dpfwiw.com/images/fpn.jpg)
![Long (4 sec) dark frame showing fixed-pattern noise.. Click to see 800x600 version. [C-2020Z]](http://dpfwiw.com/images/fpn_dark_frame.jpg)

![Oly C-2000Z with mounted CLA-1 conversion lens adapter awaiting 43-55 mm step-up ring and B-300 1.7X telephoto converter. Click to see 640x480 version. [D-340L]](http://dpfwiw.com/c-2000z/lenses/ac2kacc10m.jpg)
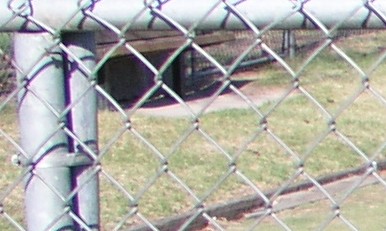
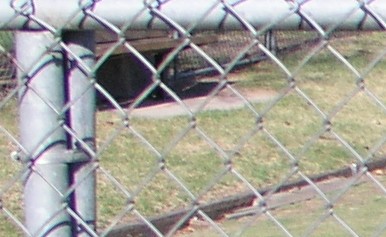
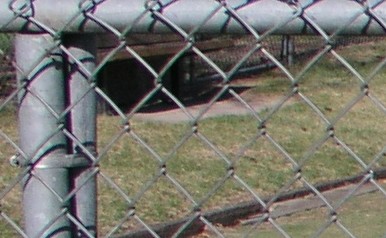
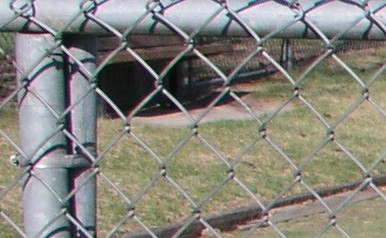
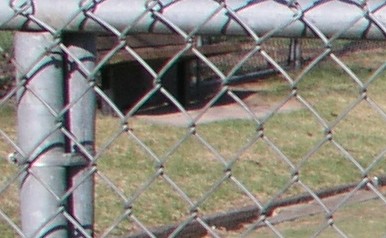
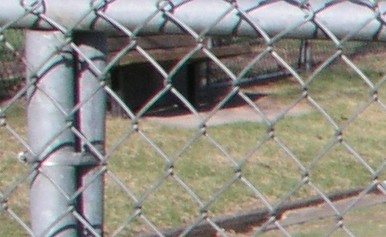
![Perspective at 105 mm [C-5050Z]](http://dpfwiw.com/images/coupe-105mm.jpg)
![Perspective at 25 mm with the help of a 0.7x conversion lens [C-5050Z]](http://dpfwiw.com/images/coupe-25mm@.jpg)
![Fern emerging from frozen lava whirlpool, Napau Crater Trail, Hawaii Volcanoes Nat'l Park. Click to see 1280x960 original. [D-340L]](http://dpfwiw.com/images/lava-fern.jpg)
|